Chat View Interface
The Chat View Interface in CEQUENS allows agents to efficiently manage customer queries, access conversation transcripts, and collaborate with team members. It offers robust functionality, including options to reassign requests, add agents, and integrate with external platforms for enhanced productivity and streamlined communication.
- Select "Chat" from the left menu to open a new chat window in your browser.
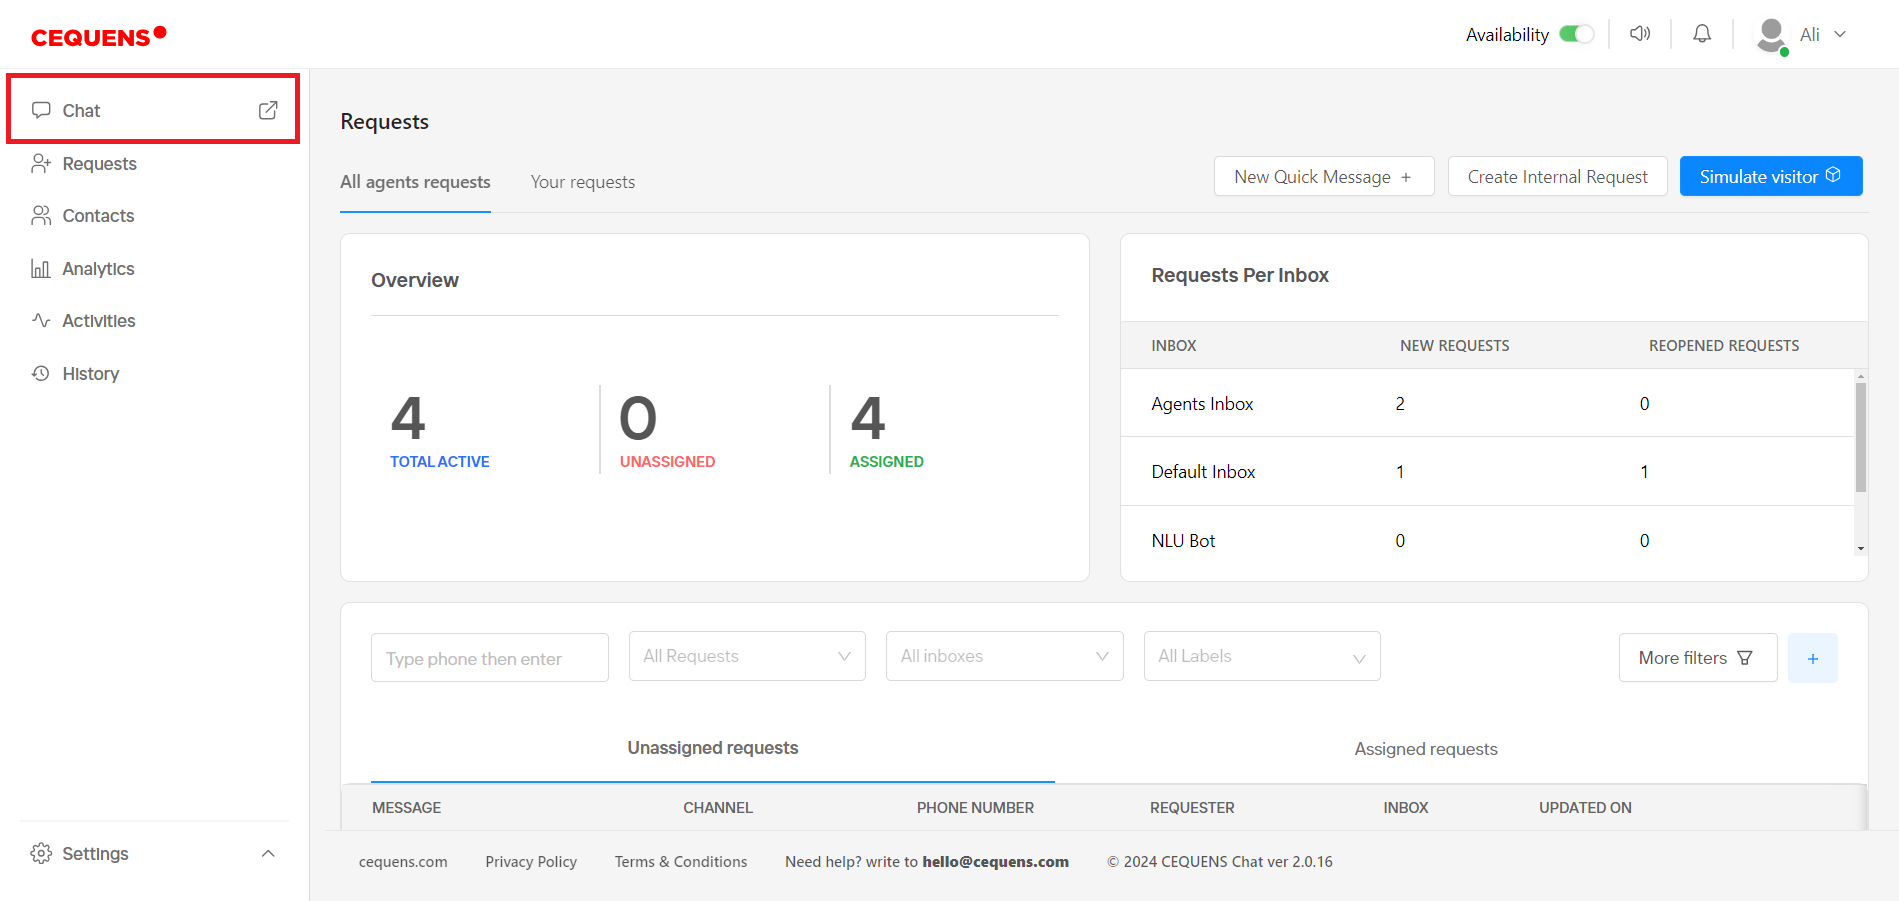
- In the chat window, you can respond to customer queries and manage all conversations. Select the inbox by clicking 'Inbox' dropdown from the left sidebar.
- On the left side, access requests assigned to you, sortable by "Updated On" and "Created On." Use options to filter requests by all conversations, unassigned, assigned to me, and resolved.
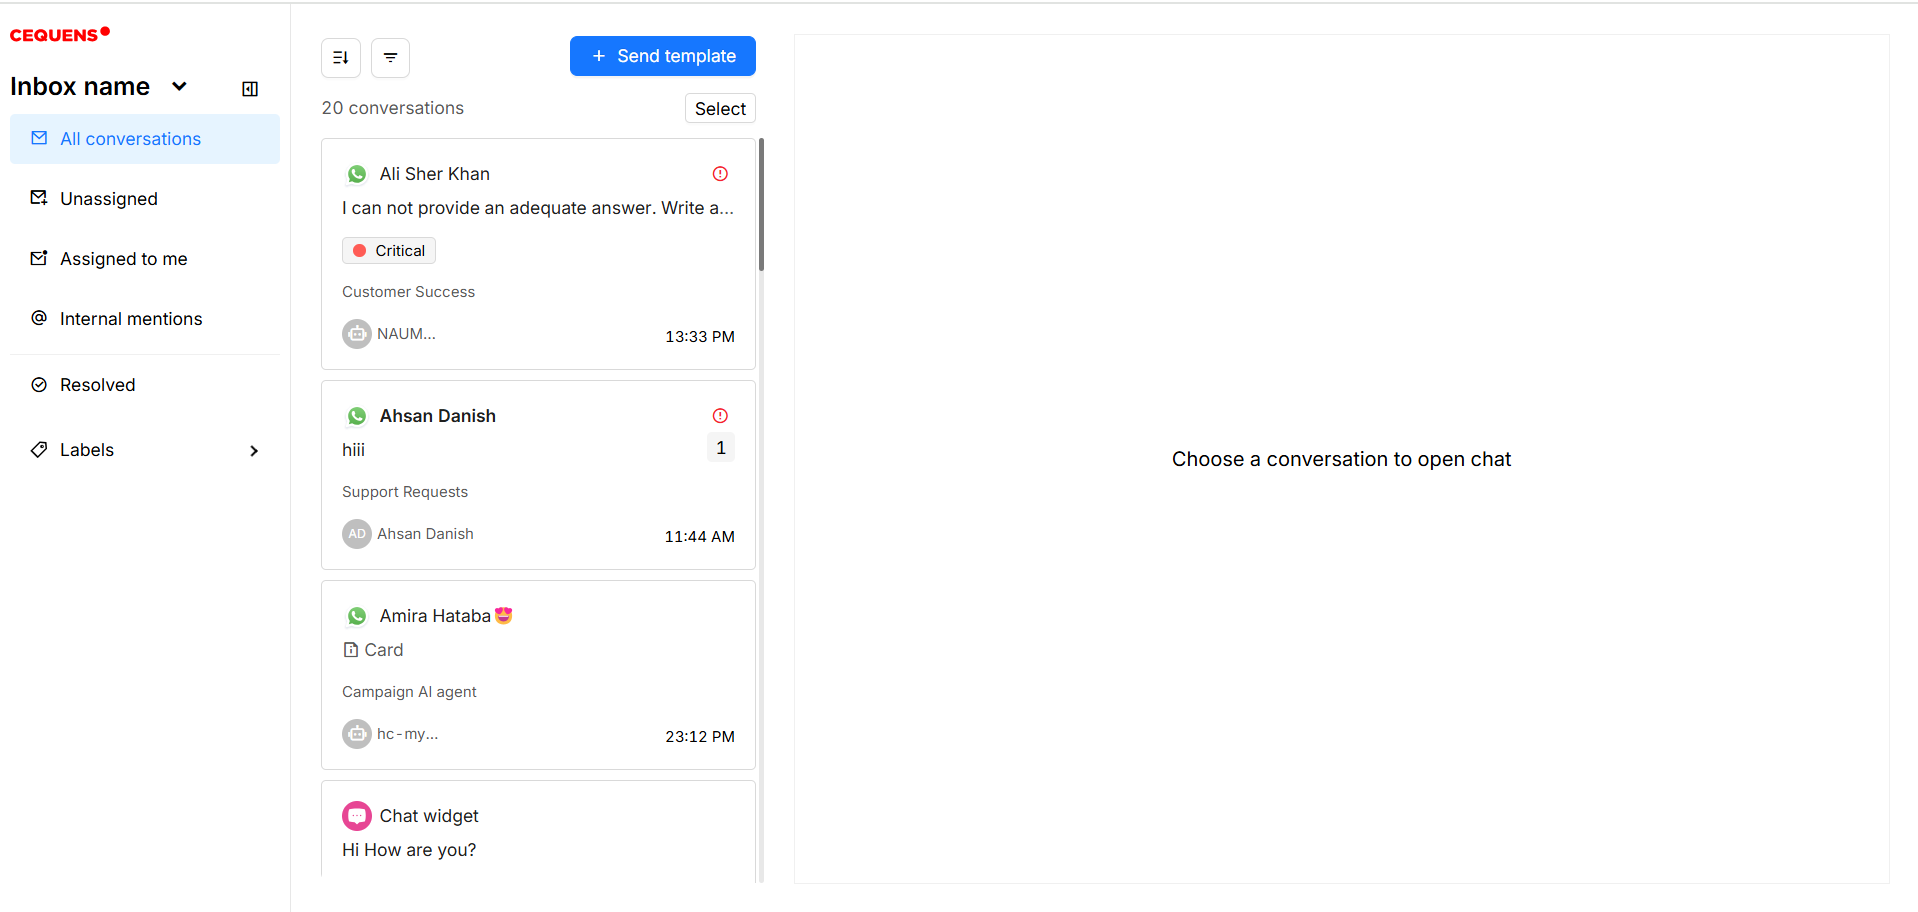
- Also, create labels by accessing the option of labels on the left sidebar and see the requests where you were mentioned by other agents by clicking internal mentions option.
- Click on a request to view the conversation. Here, you can reply to the customer, attach files, and send a survey form by clicking on three dot menu in the text editor.
- Access the AI Assistant to view summarized versions of previous conversations and translations.
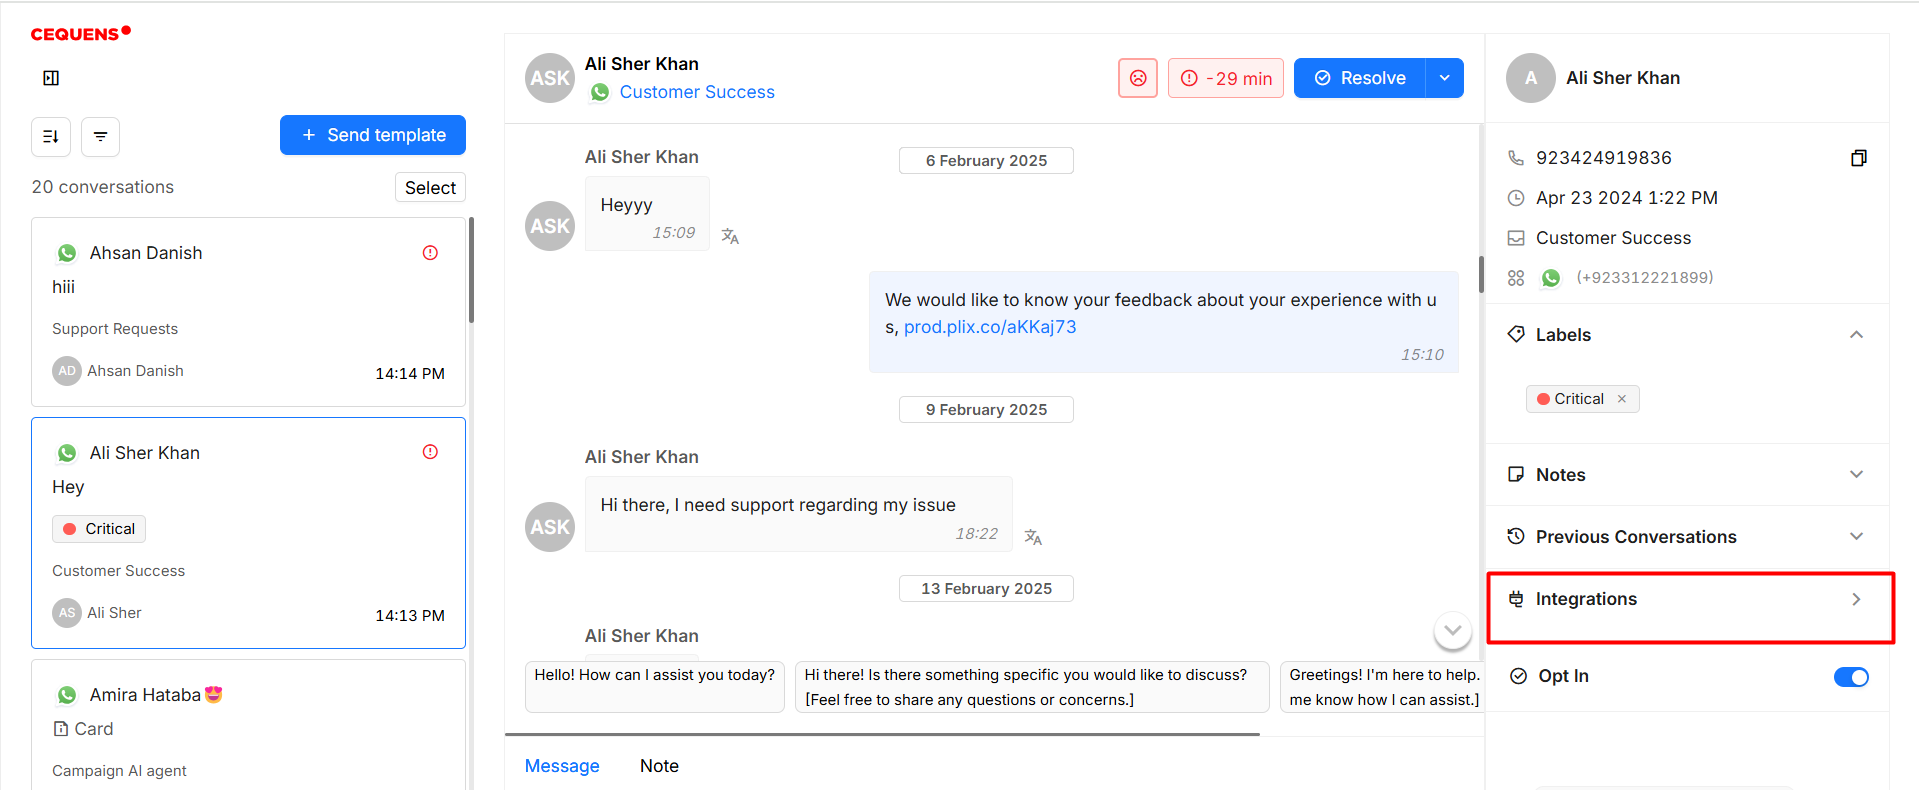
- On the right panel, view customer details such as name, email, creation date, inbox, and channel.
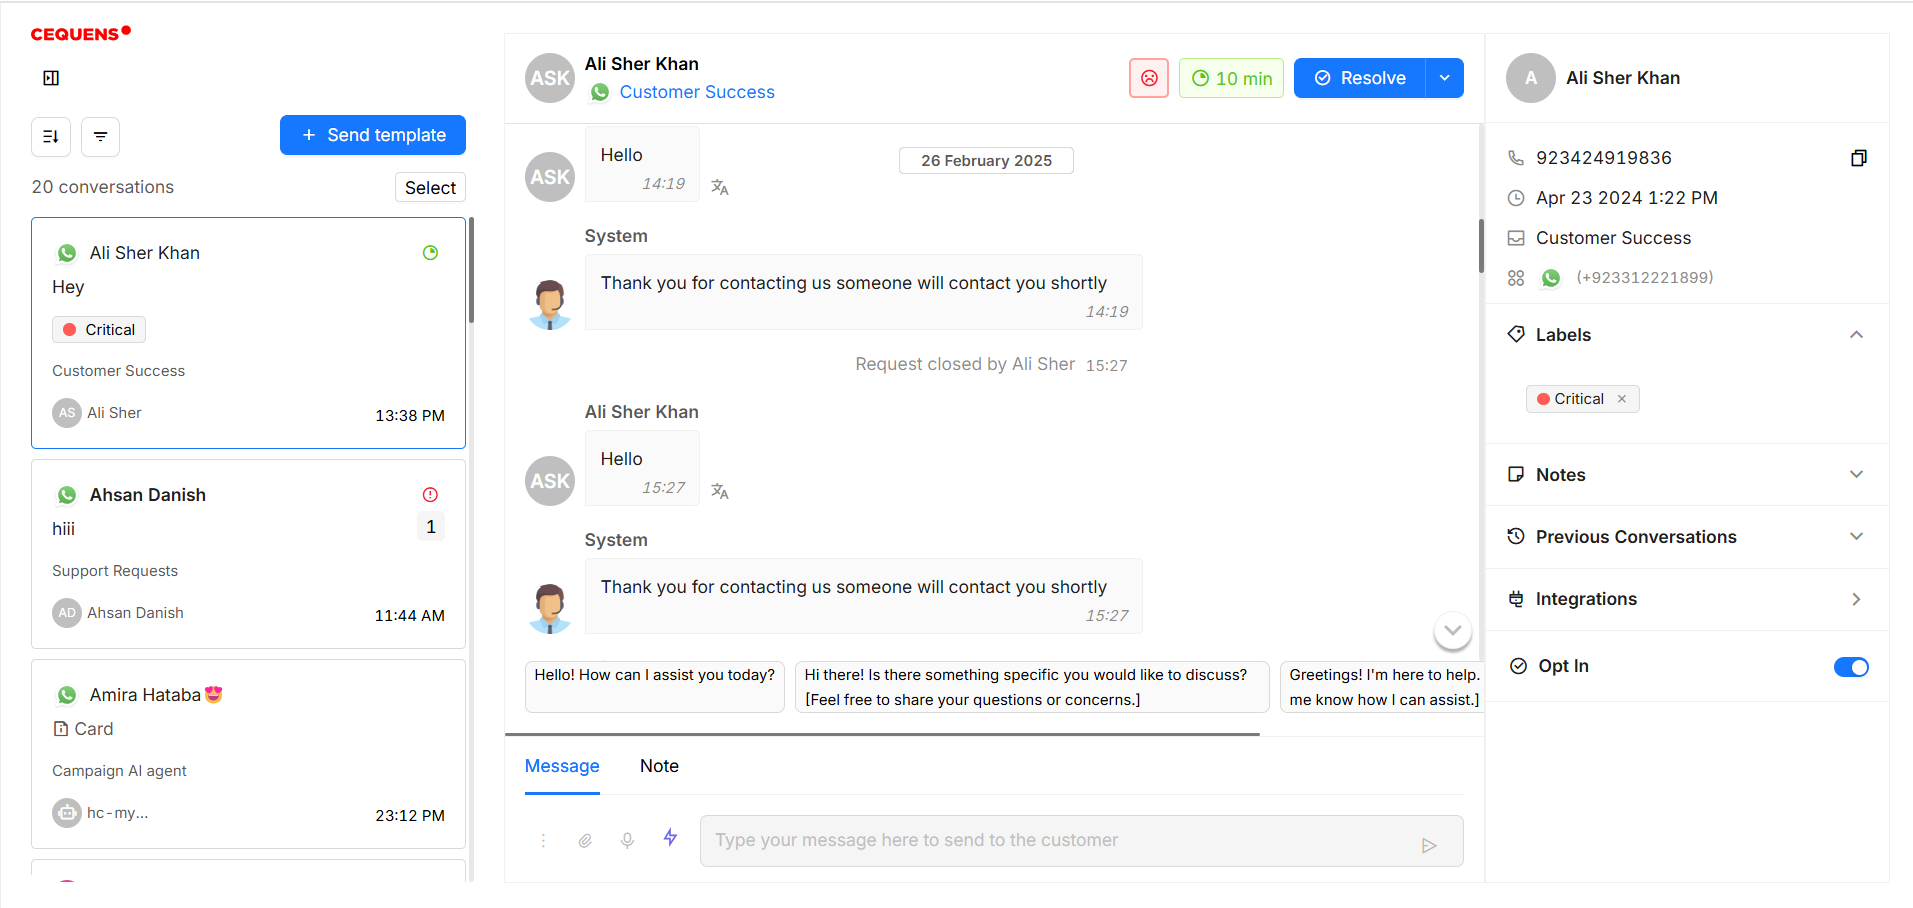
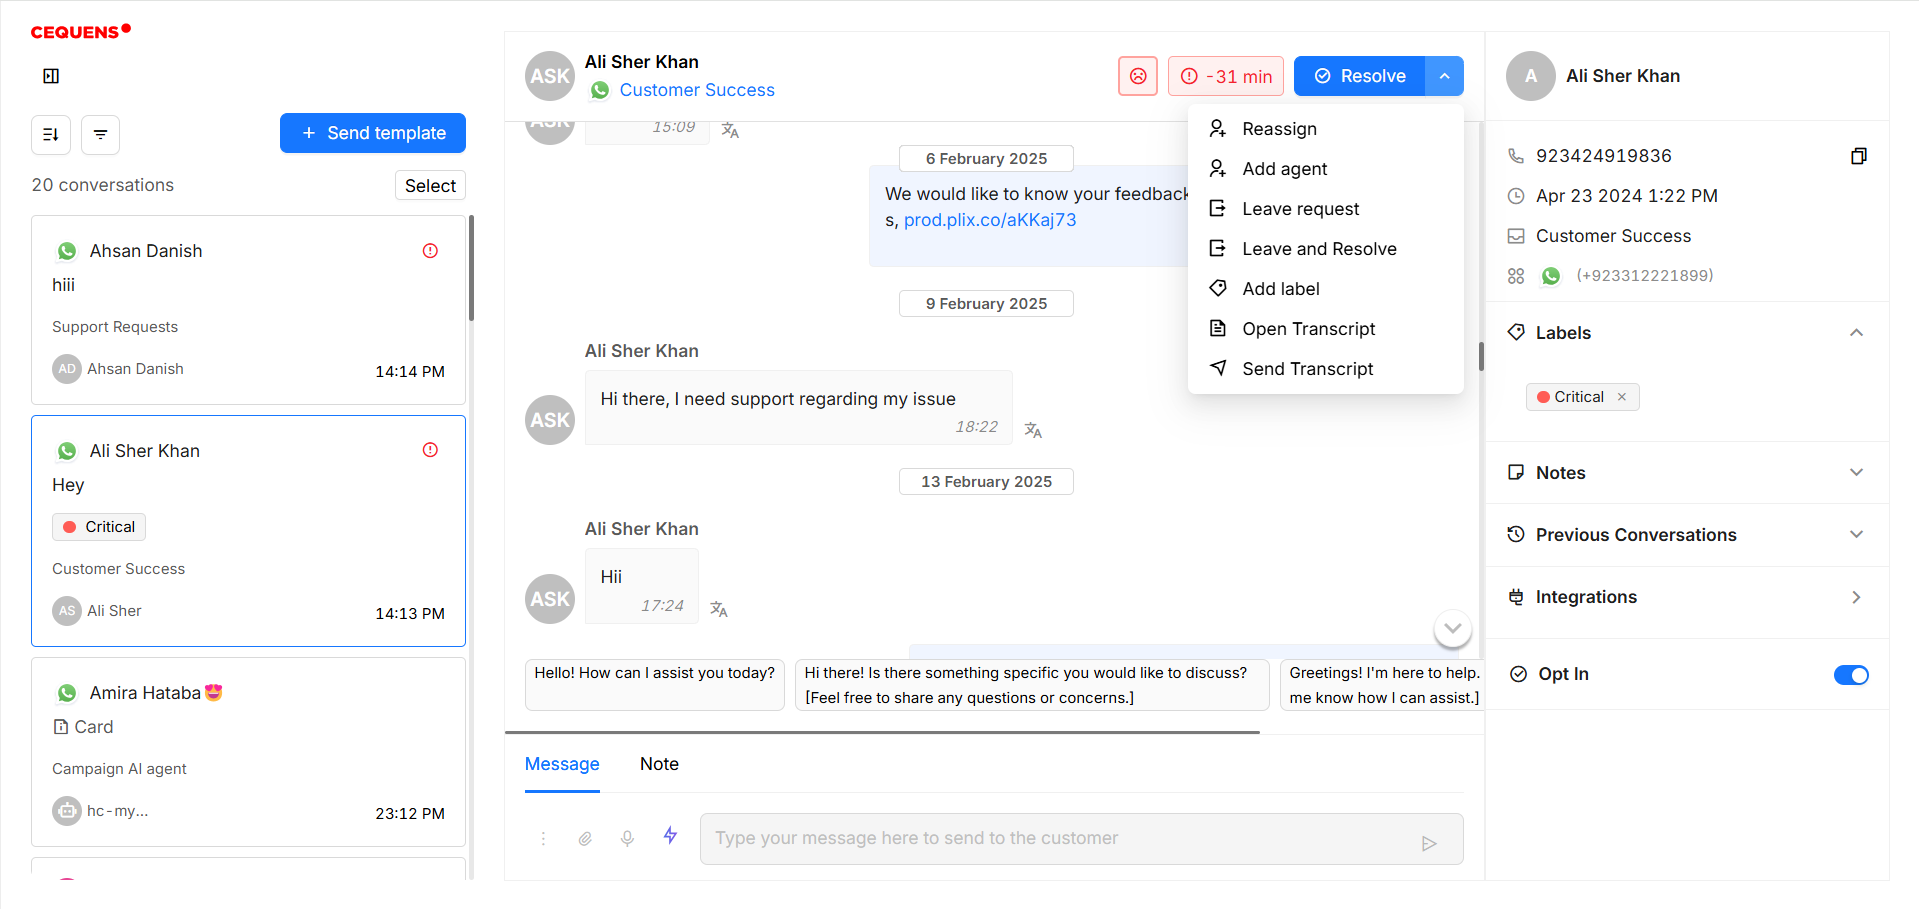
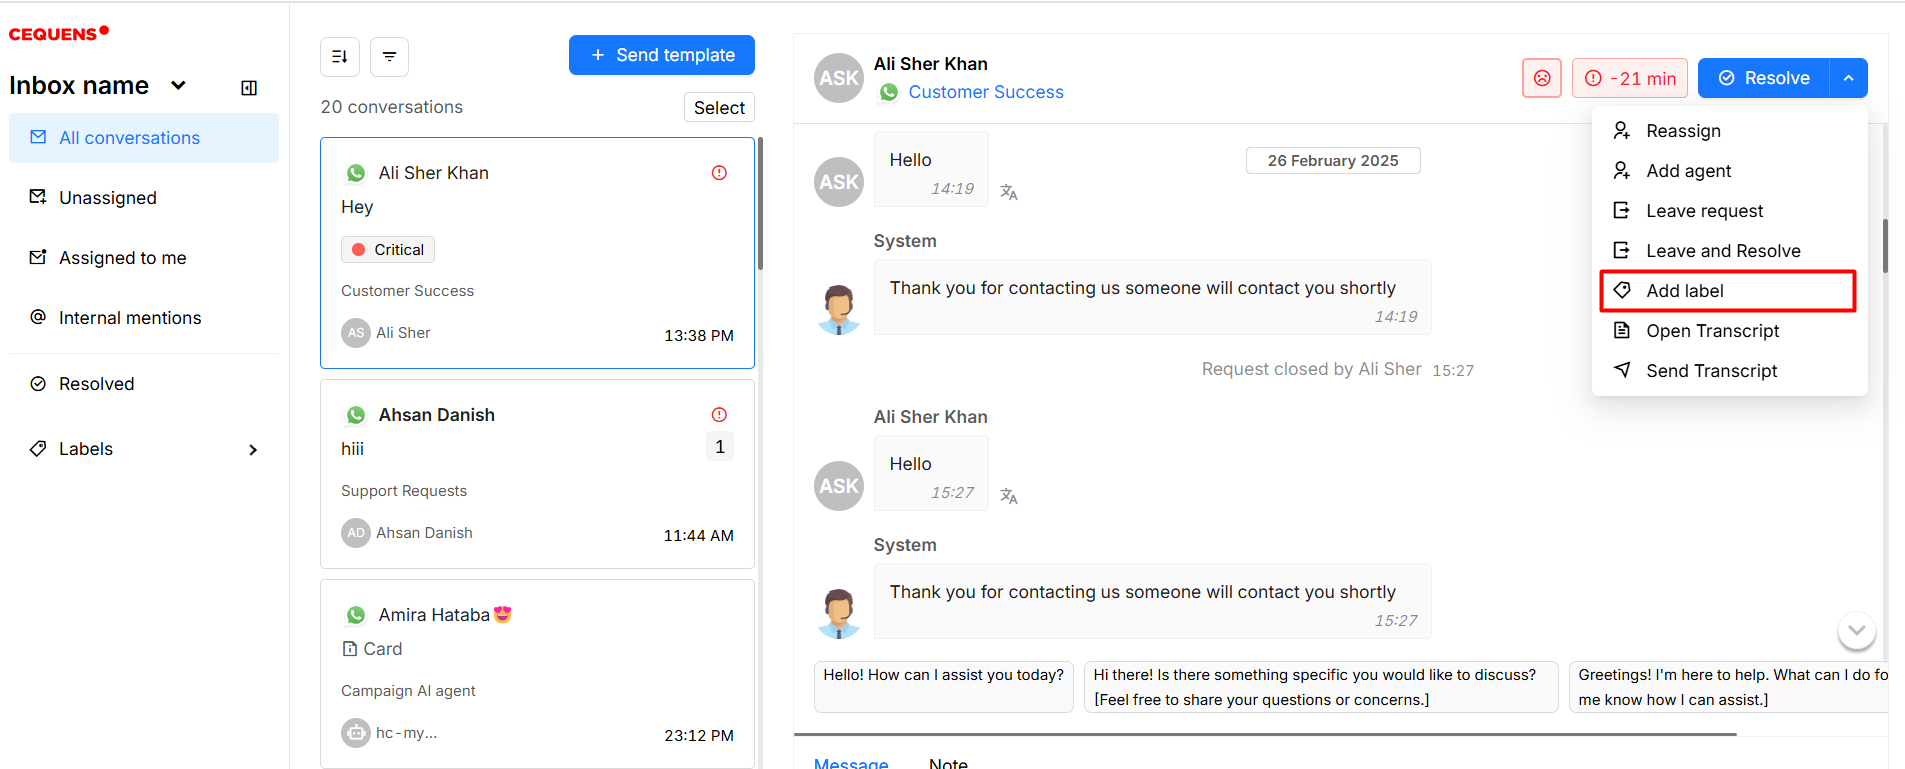
- From the actions menu, access options to reassign the request to another agent or inbox, add agent to involve another agent, leave request, leave and resolve, resolve only and also add label by clicking on add label option.
a. Leave Request: Leaves the chat without assigning it to you.
b. Resolve: Marks the request as closed but keeps it assigned to you.
c. Leave and Resolve: Leaves the chat and marks it as closed, unassigning it from you.
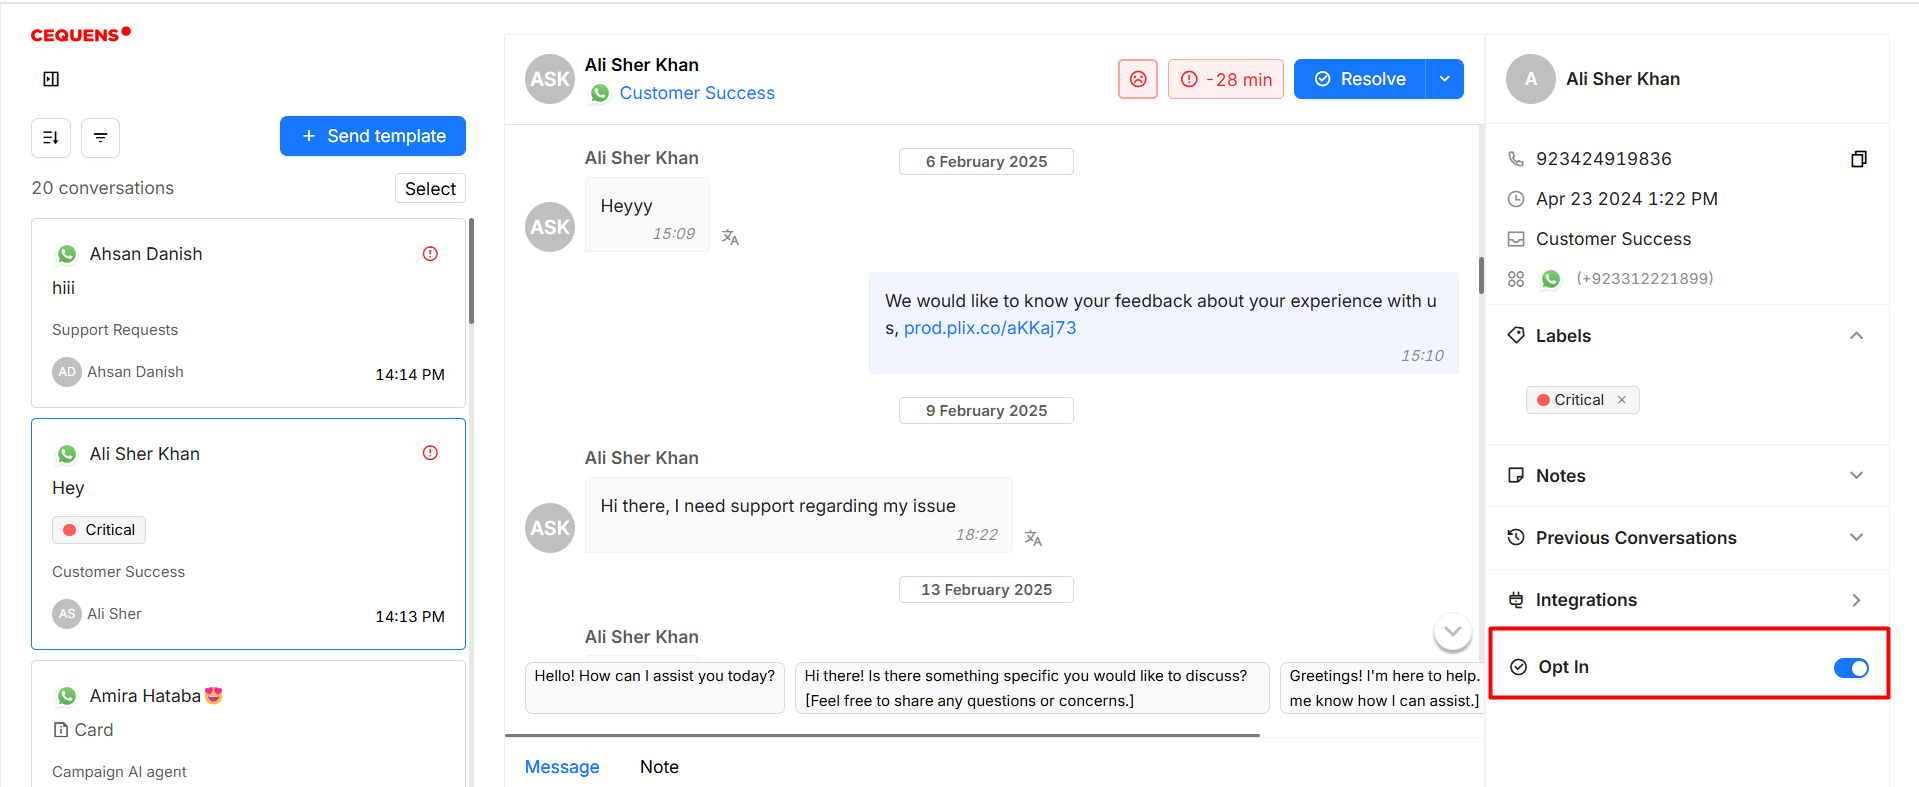
- On the right panel, you can also view agents, add labels, add notes, toggle Opt In, and integrate with other platforms.
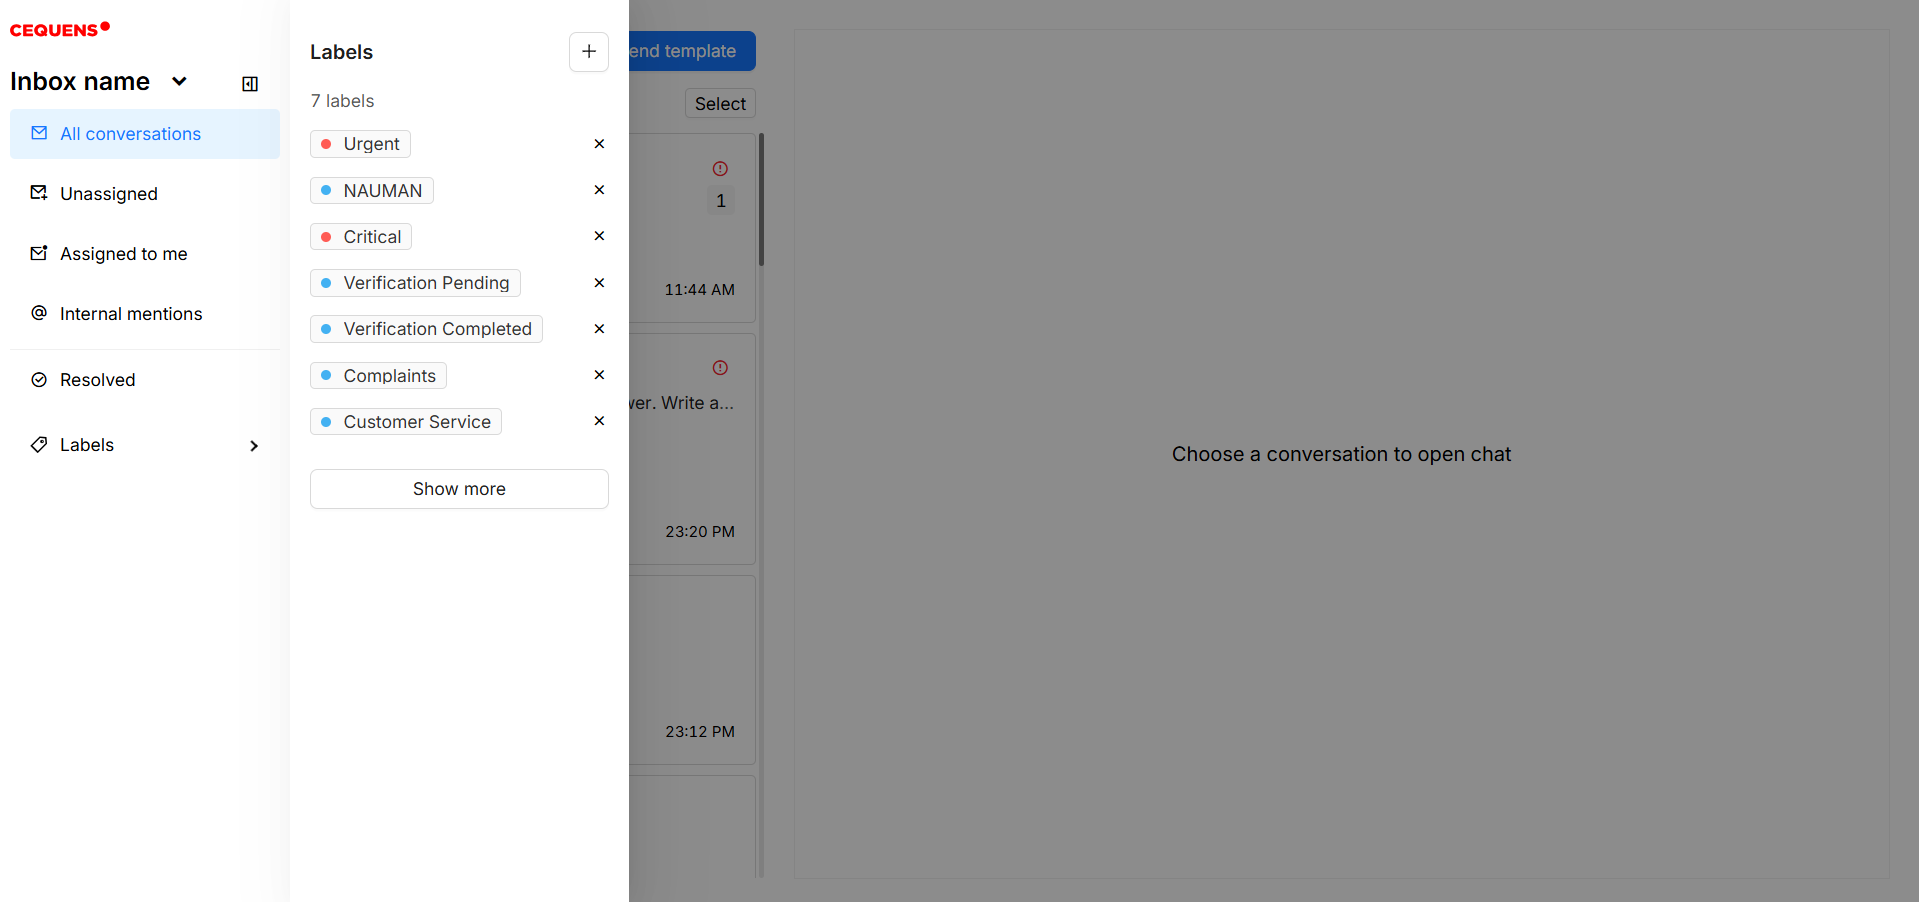
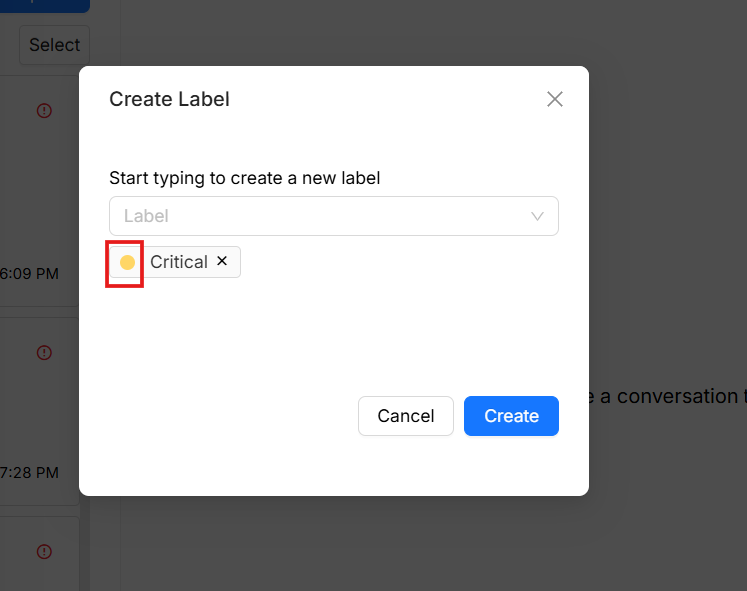
- Add Labels to the conversations. Admins are allowed to create labels. To create a label, click on Labels on left sidebar and then click '+' icon on top.
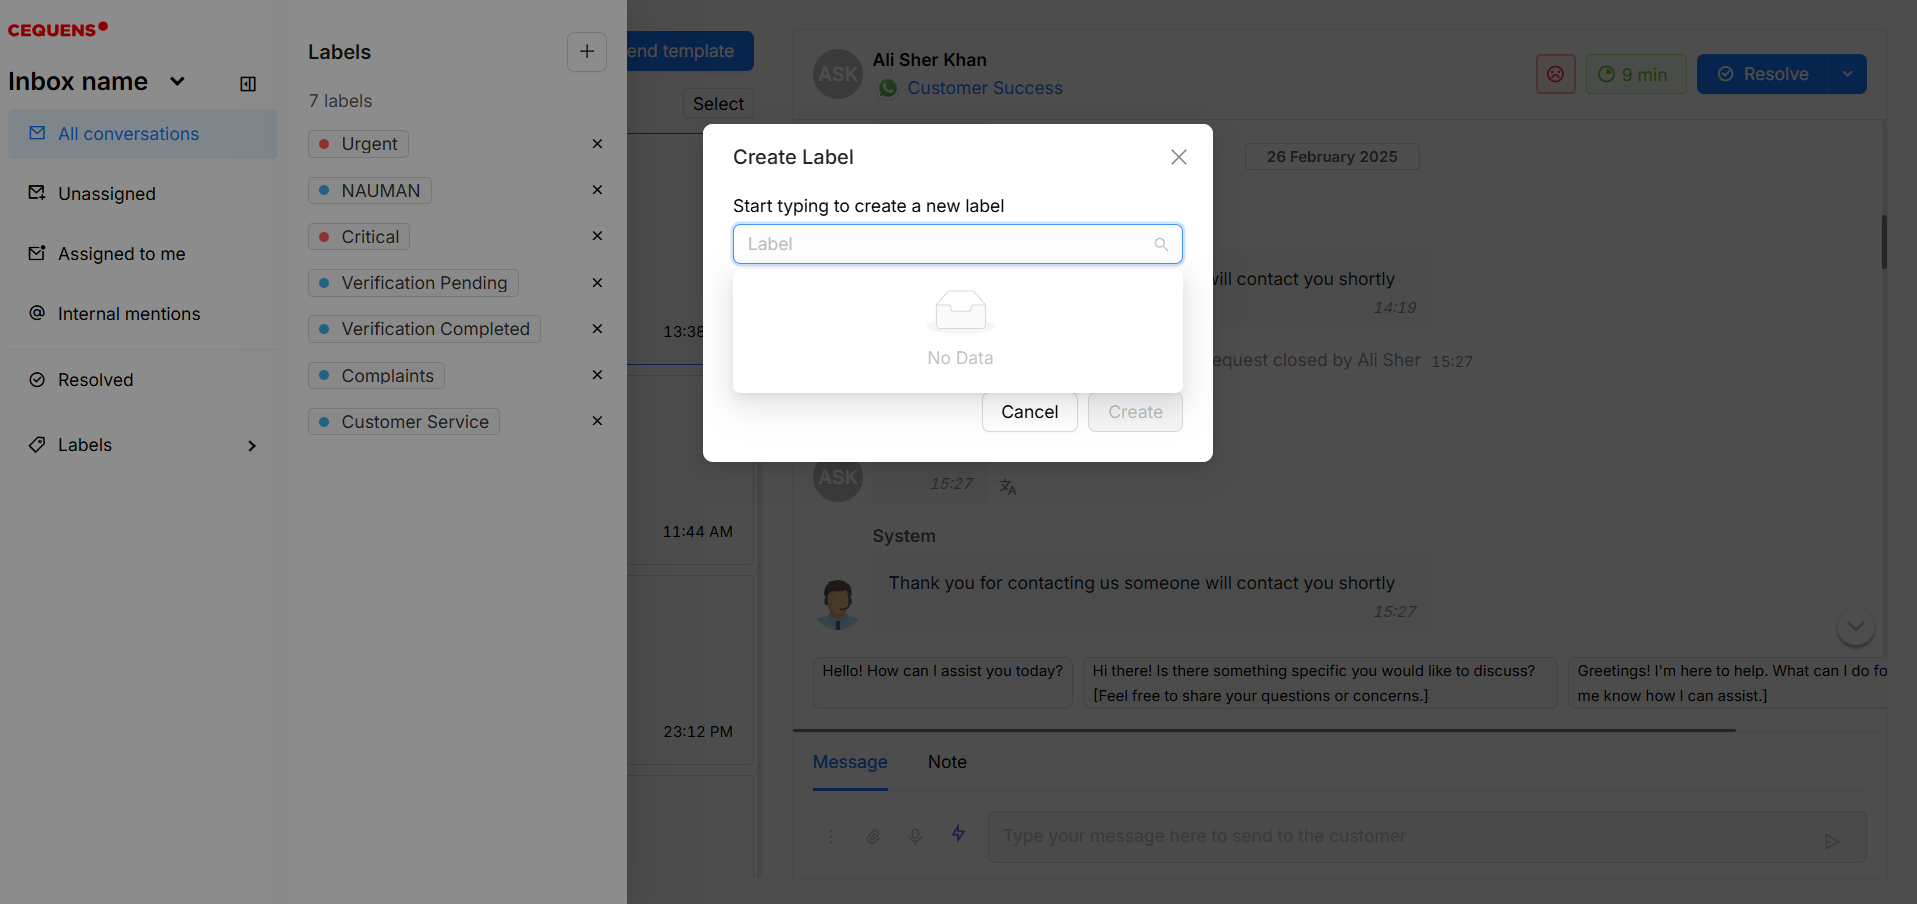
- On the pop-up, start typing the name of label and if label doesn't exist in the system, it will show you an option of Create label with this name.
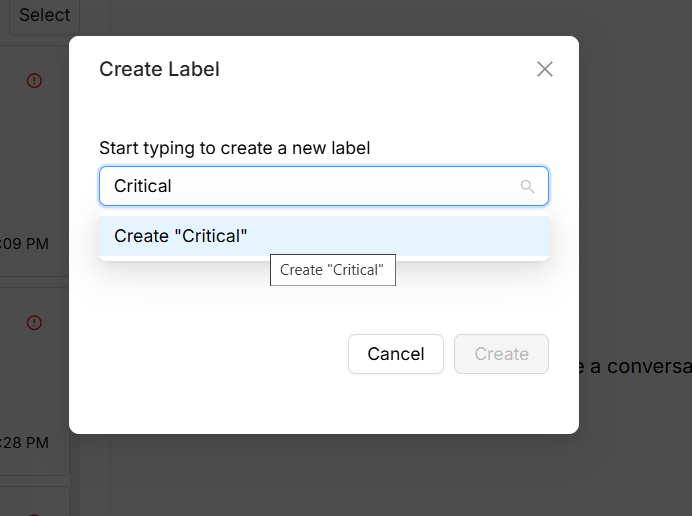
- To change the color of label, click on the color of the label and select the colors from the options. Click on Create button to create the label in the system.
- To add a label to the request, either it can be added from bulk actions or individually within a particular chat.
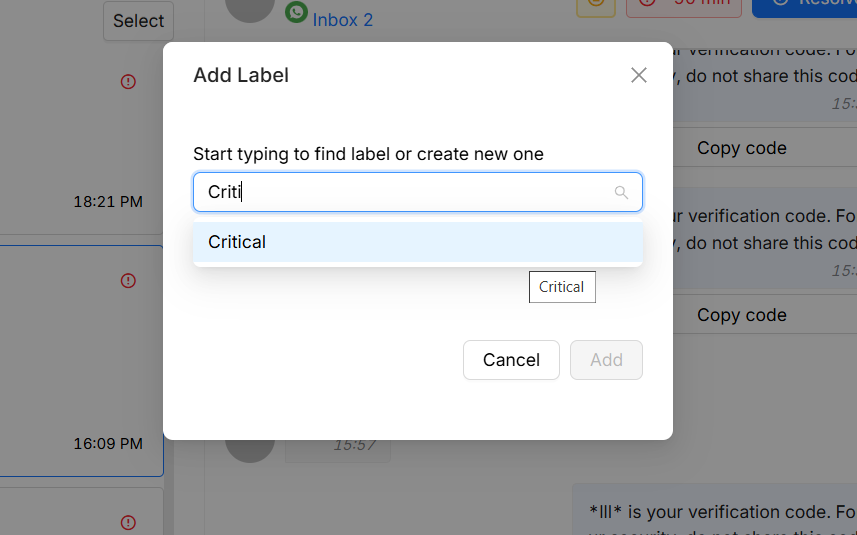
- To add a label to a particular request, click the actions menu and click on Add Label option.
- Search the label that you want to add in the search bar and click Add.
- Added label will be shown on the labels sections on customer details.
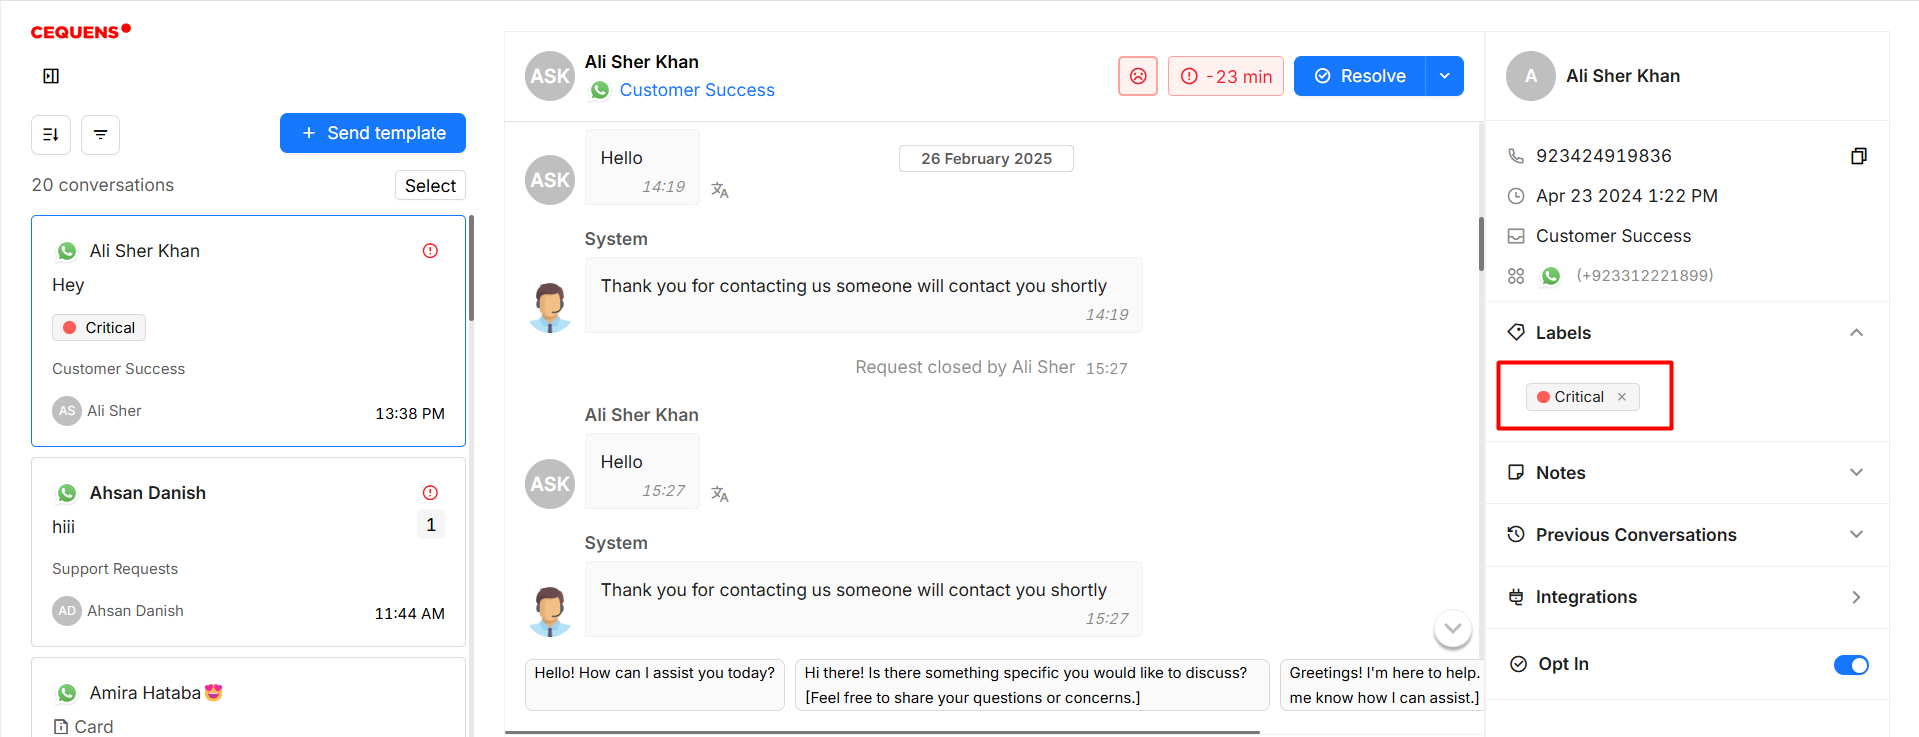
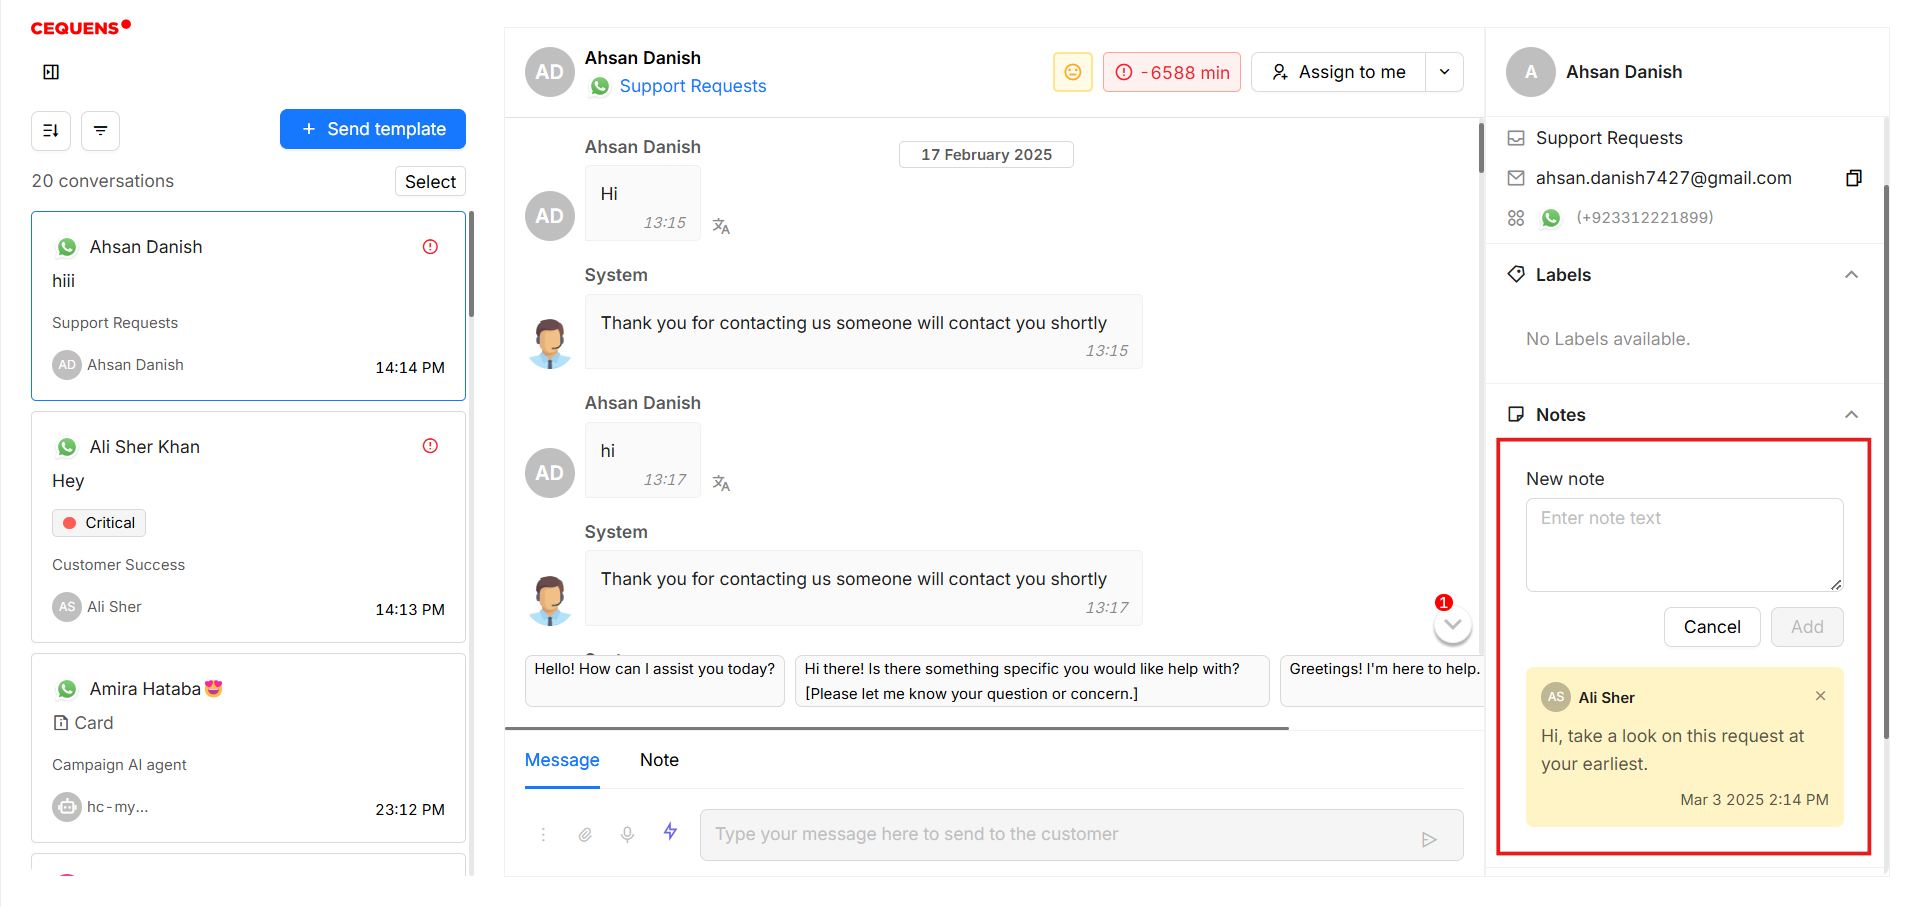
- Add a note to the requests by clicking on the Notes in the right panel. Add a note in the textbox and click on add.
- Opt In is an attribute added on the contact level on Omni-Channel chat, to indicate whether the customer accepted receiving messages from the business or not. It is set to false by default for all contacts until changed for each one individually upon this contact’s interest in receiving messages from the business. You can change it by clicking on the toggle.
- Integrations: Omni channel chat offers you to integrate with external systems such as Freshdesk and HubSpot. If you have integrated with any of the platforms, you will find the integration here by clicking on the integrations.