Getting Started
Welcome to the Omni-Channels Chat (OCC) platform. This guide will help you quickly learn how to use OCC to manage your customer communications effectively.
What is OCC?
OCC (Omnichannel Chat) is a unified customer communication platform that allows your team to manage conversations from multiple channels in one place. Whether your customers reach out via WhatsApp, Instagram, Messenger, RCS, Apple Business Chat, or your website widget, your agents can respond from a single, centralized inbox.
Key Benefits:
- Unified inbox: Manage all customer conversations across channels without switching platforms
- Team collaboration: Route conversations intelligently, collaborate with internal mentions, and track team performance
- Automation & AI: Use bots, automated triggers, and AI-powered tools to respond faster and more efficiently
- Customer insights: Track conversation metrics, measure SLA compliance, and gather feedback through surveys
User Roles
OCC supports three user roles with different levels of access:
| Role | Capabilities |
|---|---|
| Owner | Full CEQUENS system access |
| Chat Admin | Manage all inboxes, configure settings, add users, view all conversations, assign requests, create automations, and manage integrations |
| Chat Agent | Handle assigned conversations, reply to customers, use chat tools, and view personal performance metrics |
Note: The account owner from the Console automatically becomes an Admin in OCC.
First-Time Setup Checklist
Follow these steps to get OCC up and running in less than 10 minutes:
☑️ Step 1: Enable at least one channel
Before you can receive conversations in OCC, you need to enable at least one communication channel.
Option A: Enable channels from Console
- Navigate to your Console dashboard
- Go to Channels section
- Enable one or more channels:
Option B: Enable the website widget (quickest option)
- You can enable the widget directly from OCC's Inbox Settings (we'll cover this in Step 3)
Pro Tip: Start with the website widget if you want to test OCC immediately—it requires no external channel setup.
☑️ Step 2: Default created inbox
An inbox is where conversations from one or more channels are collected and managed.
- Go to Settings → Inbox in the OCC sidebar
- You will see Default Inbox has been created for direct use
What's an inbox? Think of it as a department or team workspace. You can have separate inboxes for Support, Sales, Billing, etc.
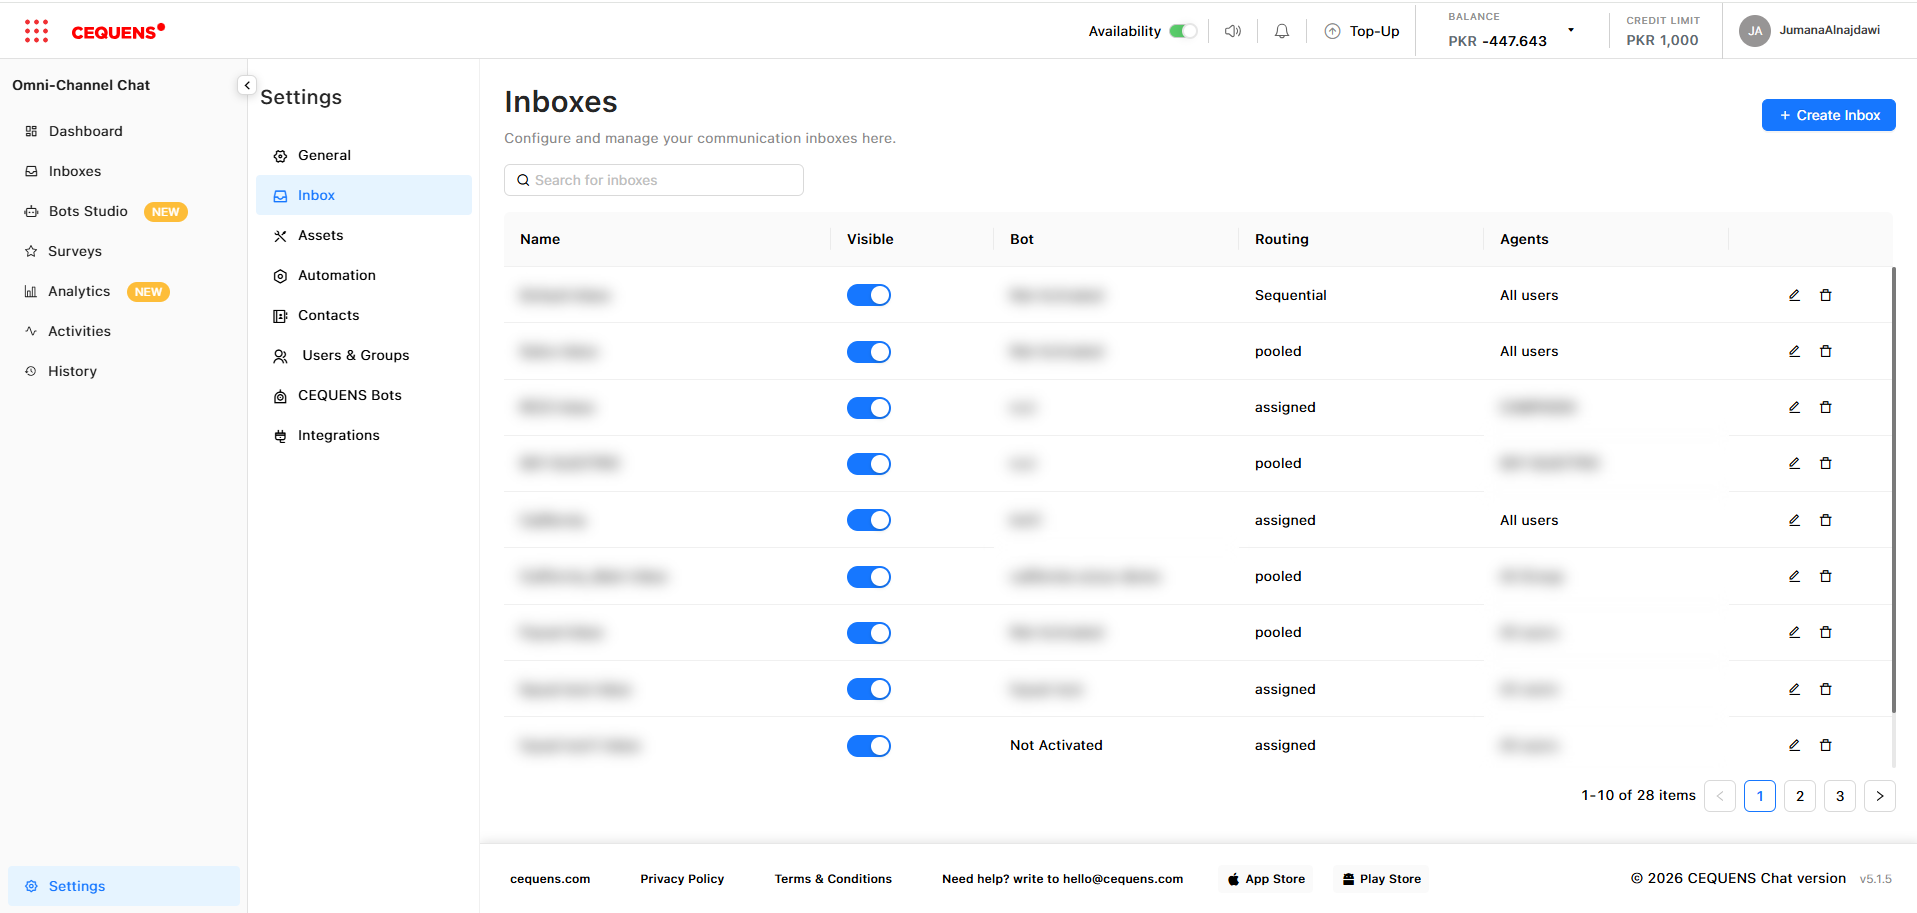
☑️ Step 3: Link your channel to the inbox
Now connect the channel you enabled in Step 1 to the inbox you just created.
For channels enabled in Console:
- In Settings → Inbox, select your newly created inbox
- Go to the "Channels" tab within that inbox
- Click "Link Channel"
- Select your enabled channel from the dropdown
- Click Save
For the website widget:
- In Settings → Inbox, select your inbox
- Go to the "Widget" tab
- Toggle "Enable Widget" to ON
- Customize your widget settings:
- Greeting message: "Hi! How can we help you today?"
- Widget appearance: Choose colors matching your brand
- Languages: Add multiple languages if needed
- Click Save
- Copy the widget code snippet
- Paste it into your website's
<head>section
Pro Tip: You can link multiple channels to a single inbox. For example, link WhatsApp, Instagram, and your widget to one "Customer Support" inbox.
☑️ Step 4: Add agents (if working with a team)
If you're working alone, you can skip this step—you're already set up as an Admin and can handle conversations yourself.
To add team members:
- Go to Settings → Users & Groups
- Click "+ Add User"
- Enter the user's email address
- Select their role (Administrator or Agent)
- Click Send Invitation

The user will receive an email invitation to join OCC.
Optional: Create agent groups
- Go to the "Groups" tab in Users & Groups
- Click "+ Create Group" (e.g., "Support Team," "Sales Team")
- Add users to the group
- Assign this group to specific inboxes for organized routing
☑️ Step 5: Configure basic routing (optional)
By default, new conversations appear in the Dashboard as unassigned. You can manually assign them to agents, or set up automatic routing.
To set up routing:
- Go to Settings → Inbox → Select your inbox
- Go to the "Routing" section
- Choose a routing type:
- Pooled: All agents see unassigned requests and can pick them up (best for small teams)
- Assigned: Automatically assigns requests to specific agents in rotation (best for balanced workload)
- Sequential: Assigns to agents in a specific order (best when you have priority/seniority)
- Select the agent group that will handle this inbox
- Click Save
☑️ Step 6: Start receiving conversations!
You're all set! Here's what happens next:
- When a customer sends a message through any linked channel, it appears in OCC
- Admins/Supervisors see all new requests in the Dashboard
- Agents see requests assigned to them in the Inbox
- Click on any conversation to view details and reply
Your first conversation will show up in:
- Dashboard (if unassigned or you're an Admin/Supervisor)
- Inbox (main workspace for replying)
Congratulations! Your OCC is now live and ready to handle customer conversations. 🎉
Updated 6 months ago