Widget Setup
Overview
The website widget allows customers to chat with you directly from your website—no external app required. Customers can start conversations without leaving your site, and all messages appear in your OCC Dashboard/Inbox.
Enabling the Widget
- Go to Settings → Inbox → Select your inbox
- Click the "Widget" tab
- Toggle "Activate Chat Widget" to ON
- Click Edit Inbox
Customizing the Widget
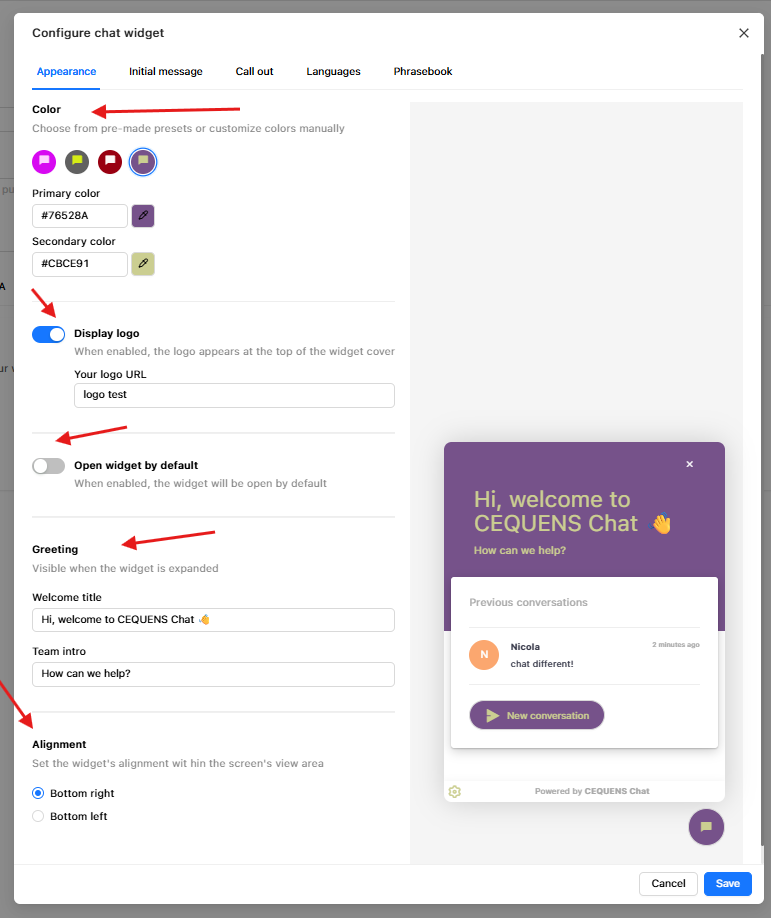
Appearance
Primary Color:
- Choose a color that matches your brand
- This affects the widget header, buttons, and accents
Widget Position:
- Left: Widget appears in the bottom-left corner
- Right: Widget appears in the bottom-right corner (default)
Avatar:
- Upload your company logo or agent photo
- Recommended size: 80x80 pixels
- Supported formats: JPG, PNG
Greeting Message:
- The first message customers see when they open the widget
- Example: "Hi! How can we help you today?"
- Keep it friendly and action-oriented
Open Widget by default
- On/Off toggle
Initial message
Online message
Offline message

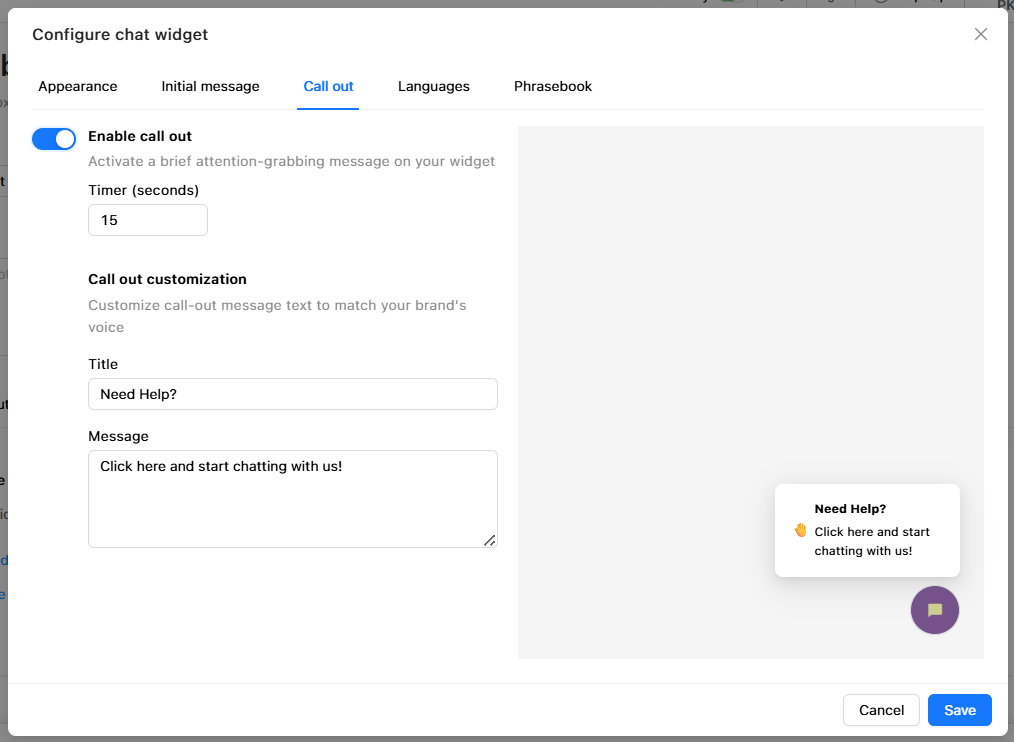
Callout Message:
- A teaser message that appears before the widget is opened
- Example: "Need help? Chat with us!"
- This appears as a small bubble next to the widget icon
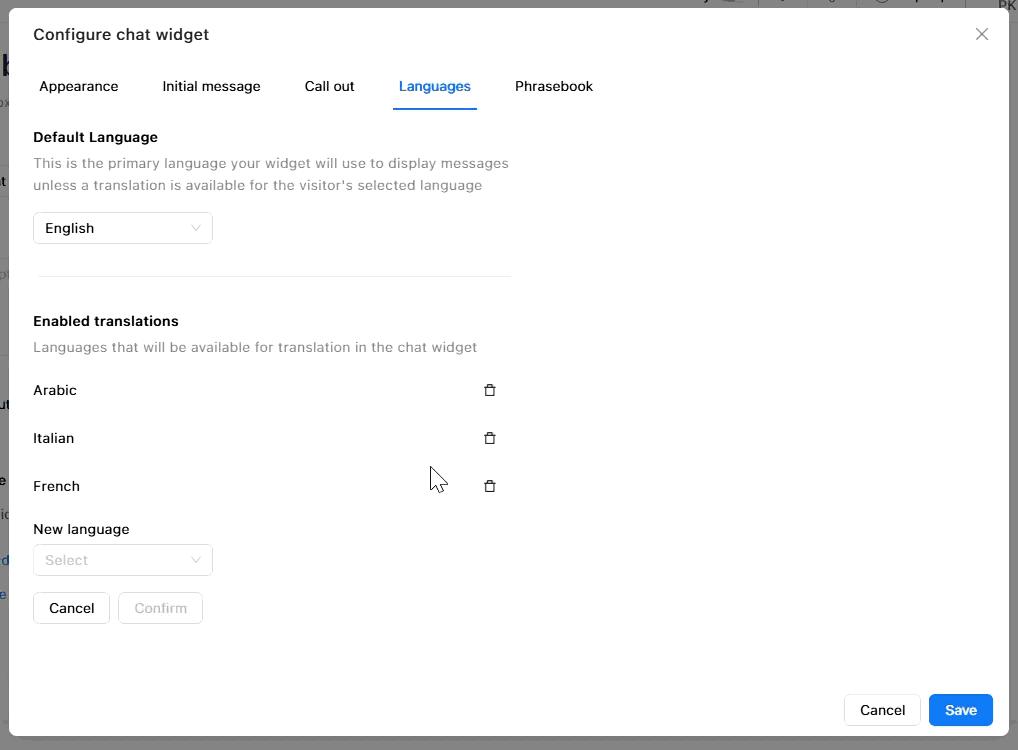
Multilingual Support
Add multiple languages so the widget automatically displays in the customer's browser language.
To add a language:
- Click "Add Language"
- Select a language from the dropdown
- Enter translated versions of:
- Greeting message
- Callout message
- Button labels (e.g., "Start Chat," "Send Message")
- Click Save
How it works:
- The widget detects the customer's browser language setting
- If a matching translation exists, it displays that version
- If no match, it defaults to your primary language
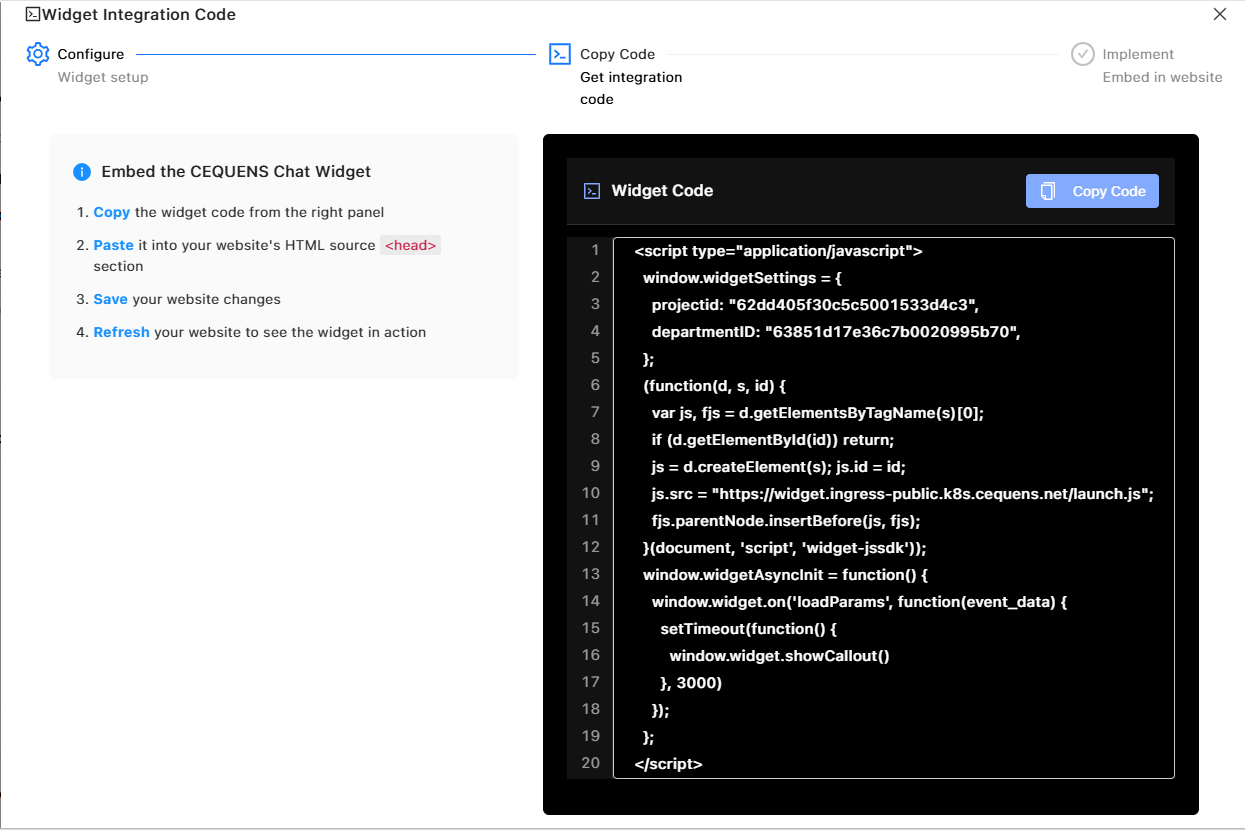
Installing the Widget Code
After customizing your widget, you need to add it to your website.
Step 2.a: Copy the Code
- In the Widget settings, scroll to "Installation"
- Click "Copy Code"
- The code is now copied to your clipboard
Step 3.b: Add Code to Your Website
The installation method depends on your website platform:
For WordPress:
- Install the "Insert Headers and Footers" plugin
- Go to Settings → Insert Headers and Footers
- Paste the widget code in the "Scripts in Header" section
- Click Save
For Shopify:
- Go to Online Store → Themes
- Click "Actions" → "Edit Code"
- Open the
theme.liquidfile - Find the
</head>tag - Paste the widget code just before
</head> - Click Save
For Custom HTML Sites:
- Open your website's HTML template file
- Find the
<head>section - Paste the widget code just before the closing
</head>tag - Save and upload the file to your server
For Wix, Squarespace, or Other Builders:
- Look for "Custom Code" or "Code Injection" settings
- Paste the code in the Header section
- Save and publish
Important: The code must be placed in the<head>section, NOT in the<body>section. Placing it in the body may cause the widget to malfunction.
Step 3: Test the Widget
- Open your website in an incognito/private browser window (to avoid cache issues)
- The widget should appear in the bottom corner
- Click the widget icon to open it
- Send a test message
- Check that the conversation appears in your OCC Dashboard/Inbox
Troubleshooting
Widget doesn't appear on the website
Check:
- ✅ The widget is enabled in Settings → Inbox → Widget
- ✅ The code is placed in the
<head>section (not<body>) - ✅ Your website changes are published/live
- ✅ Clear your browser cache or test in incognito mode
Widget appears but messages aren't received
Check:
- ✅ The inbox is linked to a channel or has the widget enabled
- ✅ You're logged into OCC and viewing the correct inbox
- ✅ Check the Dashboard or Inbox for new unassigned requests
Widget appears in the wrong position
Solution:
- Go to Settings → Inbox → Widget → Appearance
- Change the Widget Position to Left or Right
- Save and refresh your website
Widget shows in the wrong language
Check:
- ✅ You've added the language in Widget → Multilingual
- ✅ The translation is complete (greeting, callout, buttons)
- ✅ The customer's browser language matches an available translation
Best Practices
Design:
- ✅ Use your brand colors for consistency
- ✅ Keep greeting messages short and friendly
- ✅ Upload a recognizable logo/avatar
- ✅ Test the widget on mobile devices
Multilingual:
- ✅ Add languages for your top 3-5 customer regions
- ✅ Use professional translations (avoid machine translation for customer-facing text)
- ✅ Keep translations concise to fit in the widget UI
Performance:
- ✅ Place the widget code in the
<head>for fastest loading - ✅ Test the widget after every website update
- ✅ Monitor the Dashboard for widget conversations
Updated 6 months ago