Contacts
Overview
The Contacts feature stores information about customers who have interacted with your team through OCC. Contact records are automatically created when customers start conversations and can be enriched with additional details.
To access Contacts:
- Go to Settings from the sidebar
- Click Contacts
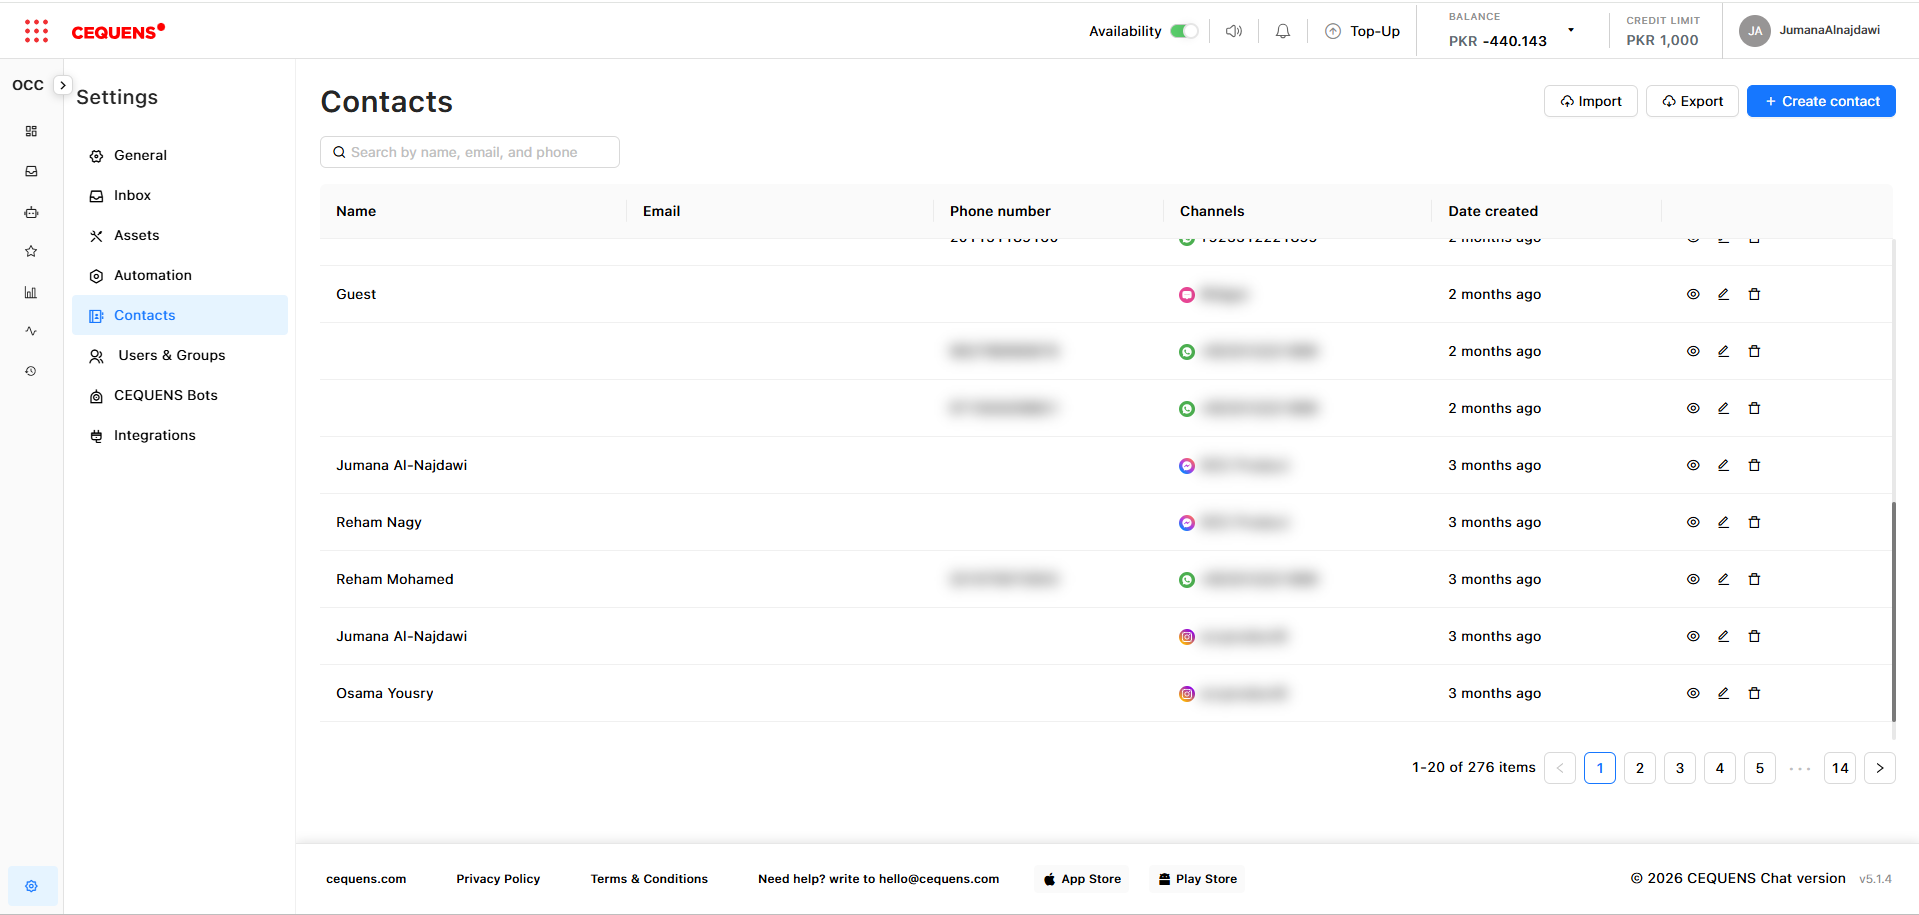
Viewing Contacts
Contact list displays:
- Contact name
- Email address (if available)
- Phone number (if available)
- Channel (where they contacted you)
- Date created
To view a contact:
- In the Contacts list, click on any contact
- View their full profile:
- Contact information
- Request history
- Custom attributes
- Notes
- Survey Feedback (if any)
How Contacts Are Created
Contacts are automatically created when:
- A customer sends their first message through any channel
- A campaign message was sent to the user
- Contact information is available from the channel (e.g., WhatsApp phone number, Instagram username)
Information captured automatically:
- Name: From channel profile (if available)
- Identifier: Phone number, email, or username (depending on channel)
- Channel: Where they contacted you (WhatsApp, Instagram, Widget, etc.)
- Created Date: Timestamp of first messag
Editing Contact Information
To edit a contact:
- Go to Settings → Contacts
- Click on the contact you want to edit
- Click "Edit" or the edit icon
- Update fields:
- Name
- Email address
- Phone number
- Company name
- Additional notes
- Click Save
Pro Tip: Encourage agents to update contact information during conversations to maintain accurate records.
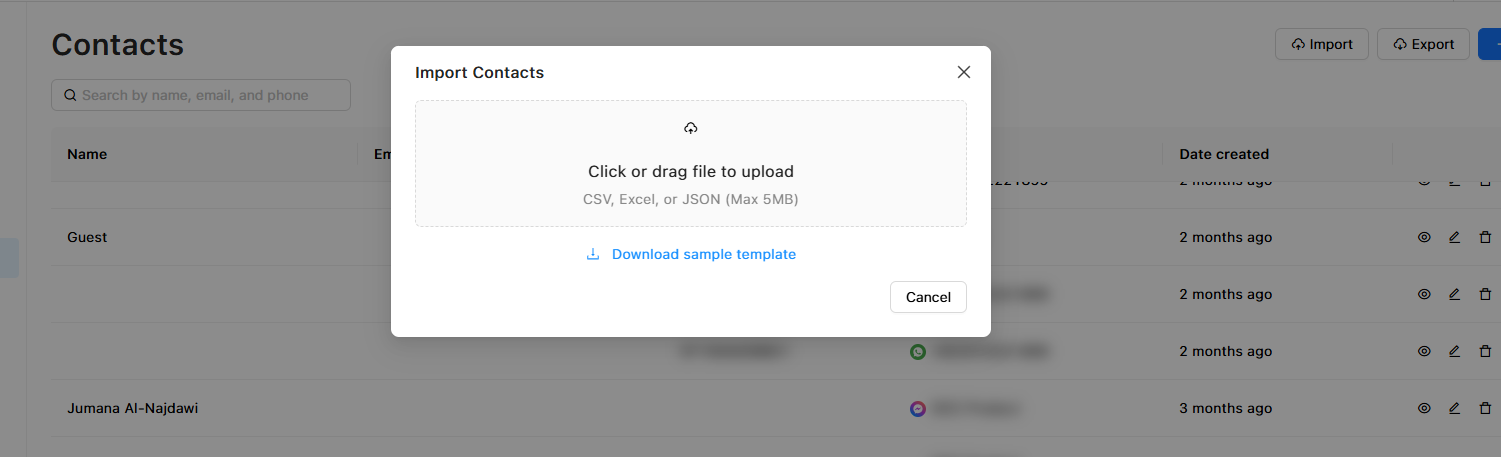
Importing Contacts
Bulk import contacts from a CSV, XLXS or JSON file to pre-populate your contact list.
To import contacts:
- Go to Settings → Contacts
- Click "Import Contacts" or "Import" button
- Download the CSV template
- Fill in the template with your contact data:
- Required fields: Name, Email, or Phone
- Optional fields: Company, Notes, Custom Attributes
- Click "Upload CSV"
- Map CSV columns to OCC fields (if prompted)
- Click "Import"
CSV file requirements:
- UTF-8 encoding
- Maximum 5MB file size
- Required columns:
name, and eitheremailorphone
Note: Duplicate contacts (same email or phone) might cause an issue during the import process.
Exporting Contacts
Export your contact list for backup, analysis, or use in other tools.
To export contacts:
- Go to Settings → Contacts
- Click "Export"
Export includes:
- All contact information
- Custom attributes
- Labels
- Conversation count
- Last interaction date
Contact Privacy and Deletion
Deleting a Contact
To delete a contact:
- Go to Settings → Contacts
- Select the contact
- Click "Delete" or trash icon
- Confirm deletion
What happens:
- Contact information is removed
- Conversations are anonymized (customer name appears as "Deleted User")
- Cannot be undone
Use for: GDPR/privacy requests, removing test contacts
Best Practices
Data Quality:
- ✅ Encourage agents to update contact info during conversations
- ✅ Regularly review and clean up duplicate contacts
- ✅ Use consistent naming conventions
- ✅ Add notes for important context (e.g., "VIP customer," "Repeat issue")
Privacy and Compliance:
- ✅ Only collect necessary information
- ✅ Secure access to contact data (limit to necessary roles)
- ✅ Respond to data deletion requests promptly
- ✅ Export contacts regularly for backup
- ✅ Document your data retention policy
Import/Export:
- ✅ Test imports with a small sample first (10-20 contacts)
- ✅ Clean data before importing (remove duplicates, fix formatting)
- ✅ Schedule regular exports for backup
- ✅ Store exports securely
Contact Segmentation:
- ✅ Use labels to segment contacts (VIP, Active, Churned, etc.)
- ✅ Create filters for common segments
- ✅ Use custom attributes for advanced segmentation
- ✅ Sync important contacts with CRM (via integrations)
Troubleshooting
Contact not appearing after conversation
Check:
- ✅ Contact information was provided by the customer
- ✅ Channel successfully captured contact details
- ✅ Refresh the Contacts page
- ✅ Search by identifier (phone/email) instead of name
Import failed
Common issues:
- ❌ CSV file not in UTF-8 encoding
- ❌ Missing required columns (name, email/phone)
- ❌ File size too large (>10,000 contacts)
- ❌ Invalid email or phone formats
Solution:
- Download the CSV template and follow the exact format
- Split large files into smaller batches
- Validate email and phone formats before import
Can't find a specific contact
Try:
- Search by multiple fields (name, email, phone)
- Check spelling and formatting
- Remove filters that might be hiding the contact
- Look in conversation history for the identifier
Updated 6 months ago