Send Email action
Intro
In the bot studio, you have plenty of actions that make your conversation flow more naturally. Some of these actions also automate the human agent’s workflows.
One such action is “Send Email”. This action is helpful for businesses from different industries.
Imagine an e-commerce site that requests a lead’s email address and automatically sends a promo code via email. Alternatively, consider a business that needs to send a confirmation email to its customers.
All these processes can be automated, with no human action required.
Okay, let’s dive into it.
First, you need to head to the bot you want to use. Enter the Design Studio.
To explain this action, I will create a very simple flow to show you how it works.
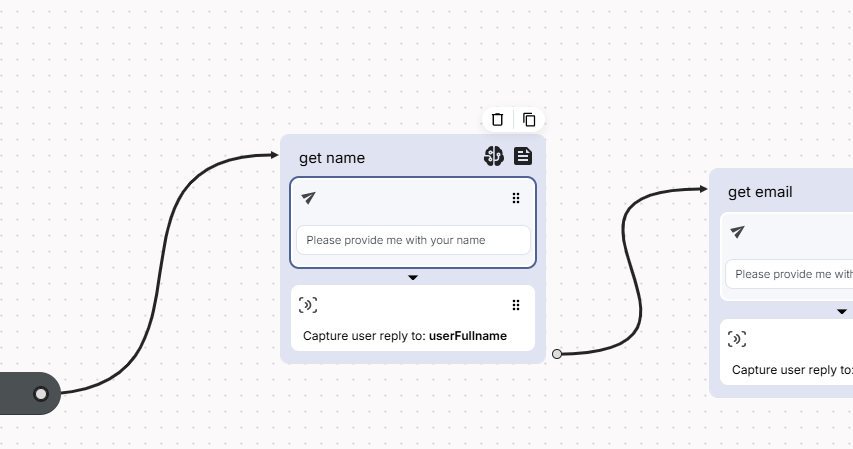
First, I will add “Capture User Reply” to ask for leads’ contact email addresses, as you can see in the image below:
Then, drag the “Send Email” action from the right-side menu and create a new Block for it.
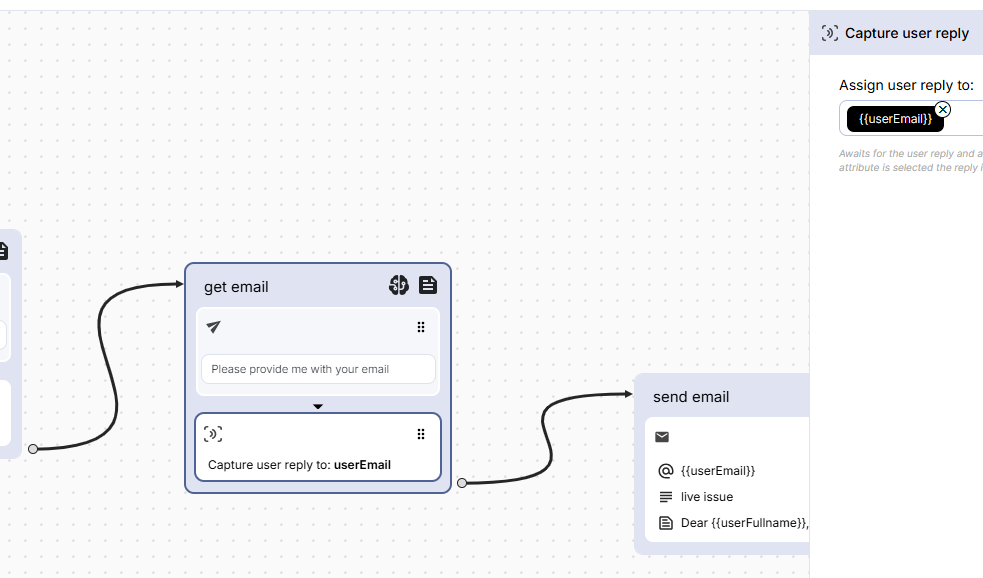
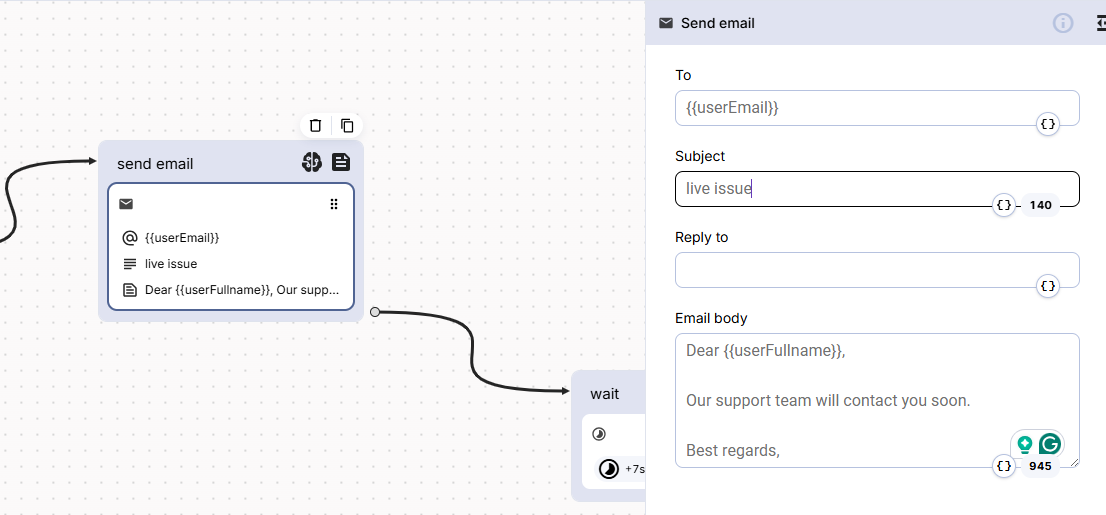
By clicking on the “Send Email” action, a pop-up window will appear on the right side of the page. From there, you can define the email address to which you want to send the email (which we asked for before).
By clicking on the attribute icon, you need to select.
For the subject of the email, I will say “CEQUENS Support Team”.
The next placeholder is "Reply To", which means if the user replies to your email, it specifies which email address will receive the user’s response.
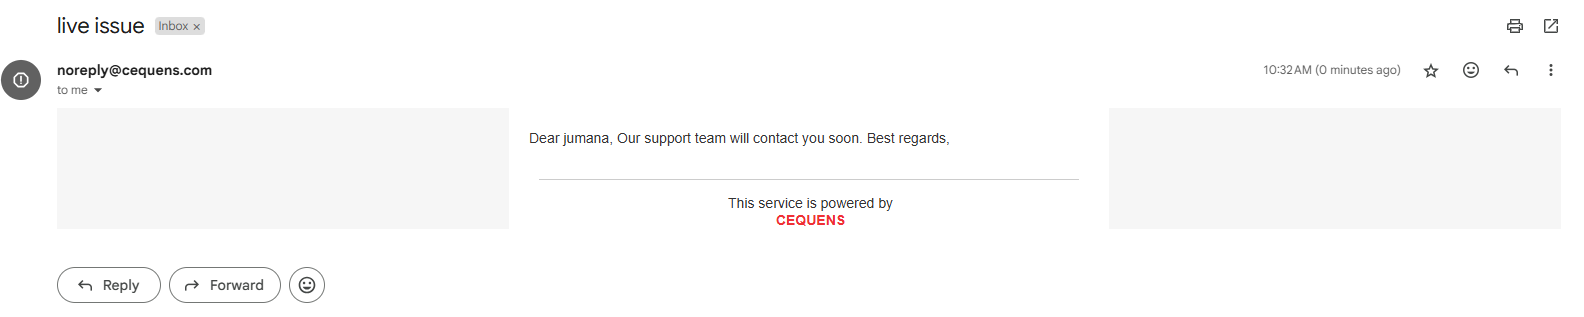
And the last one is the “Body”, where I simply write:
Dear,
Our support team will contact you soon..
Best regards,
I will add another Block to finish the conversation with the final message and “Wait” and “Close” actions.
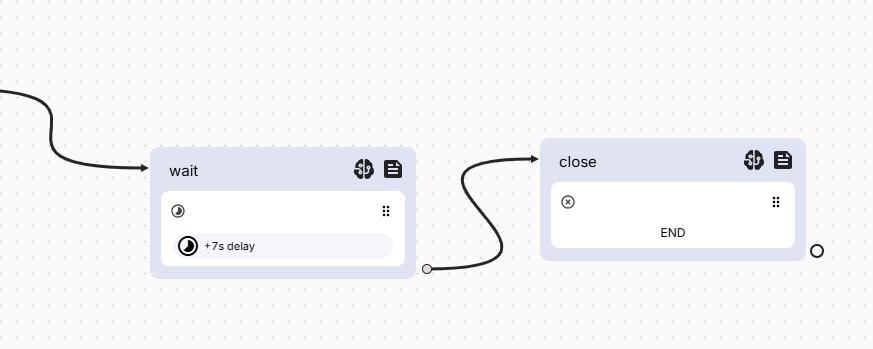
That’s all, this flow will ask for the user’s email and share an email with a promo code right away, as you can see in the image below:
Updated about 1 year ago