Triggers
The Triggers feature in CEQUENS Chat enables users to automate notifications triggered by specific events, enhancing operational efficiency and response times.
- Triggers empower users to automate notifications based on specific events occurring in their systems, such as critical updates or orders. To configure triggers, access the "Triggers" option from the left menu.

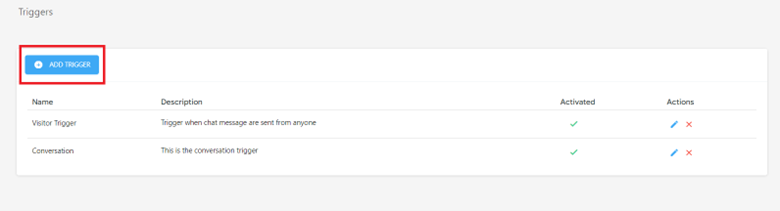
- Upon entering the trigger listing page, all created triggers are displayed, indicating their activation status. Users can manage triggers, including editing or deleting them, by utilizing the icons provided in the actions column.
- To edit a trigger, click on the edit icon in the actions column. Trigger edit page will open.

- After editing, click on Save button to save the changes.
- To add a new trigger, click on the "Add Trigger" button at the top of the page.
- When adding a new trigger, users can toggle the trigger status, enter a name and description, and proceed to customize the trigger settings.
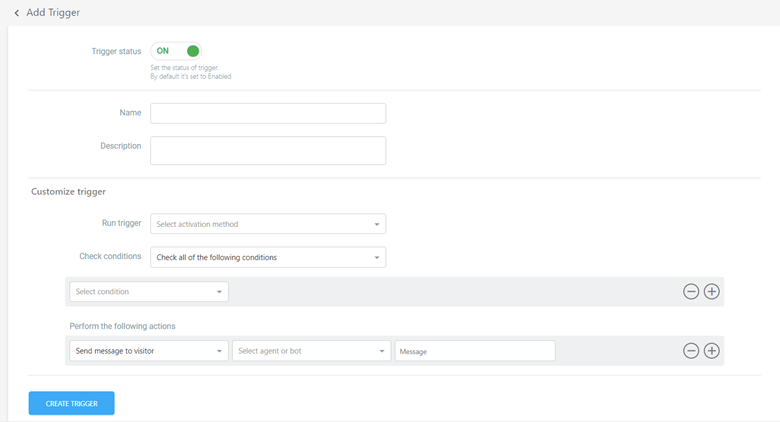
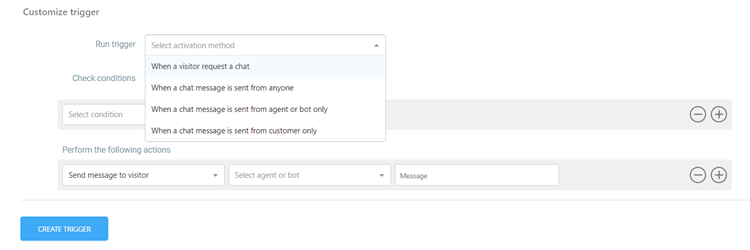
- The "Run Trigger" option determines the trigger execution behavior.
- Users can include conditions related to visitor information, page details, software/computer specifics, or chat-related data by selecting from the available options in the "Check Conditions" section. Multiple conditions can be added based on specific requirements.
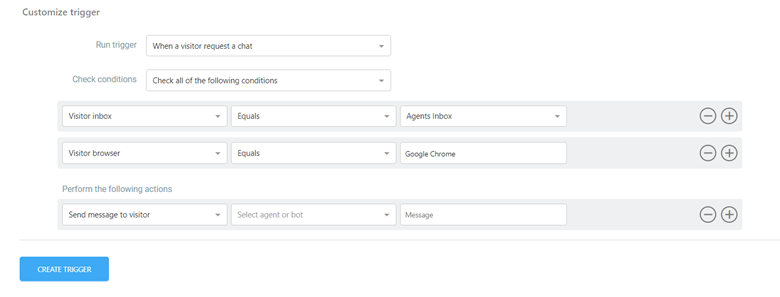
- In the "Perform the Following Actions" section, users can specify the actions to be taken when the trigger is activated. This includes sending a message to the visitor, assigning to an inbox, changing request status, closing a request, and handling agent join or leave requests.
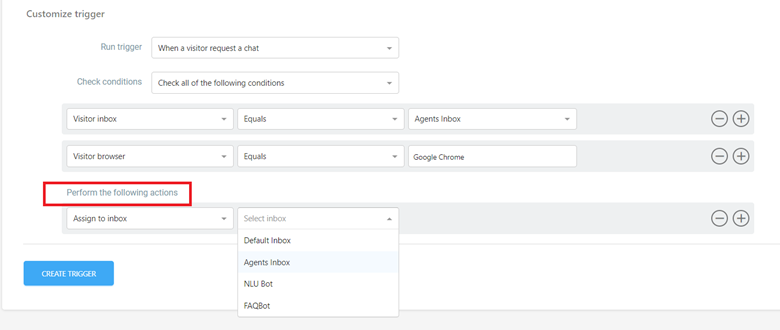
- Once all values are entered and settings configured, users can create the trigger by clicking on the "Create Trigger" button.
- This comprehensive setup ensures that triggers are accurately defined and activated within the system, facilitating timely and automated notifications based on predefined criteria.
Updated about 2 months ago